Work History

Jozsef-Hoffman-Shropshire-Tile-Doctor

Welcome to my Work History archive where you will find detailed examples of Tile, Grout and Stone Cleaning and renovation work carried out within Shropshire.

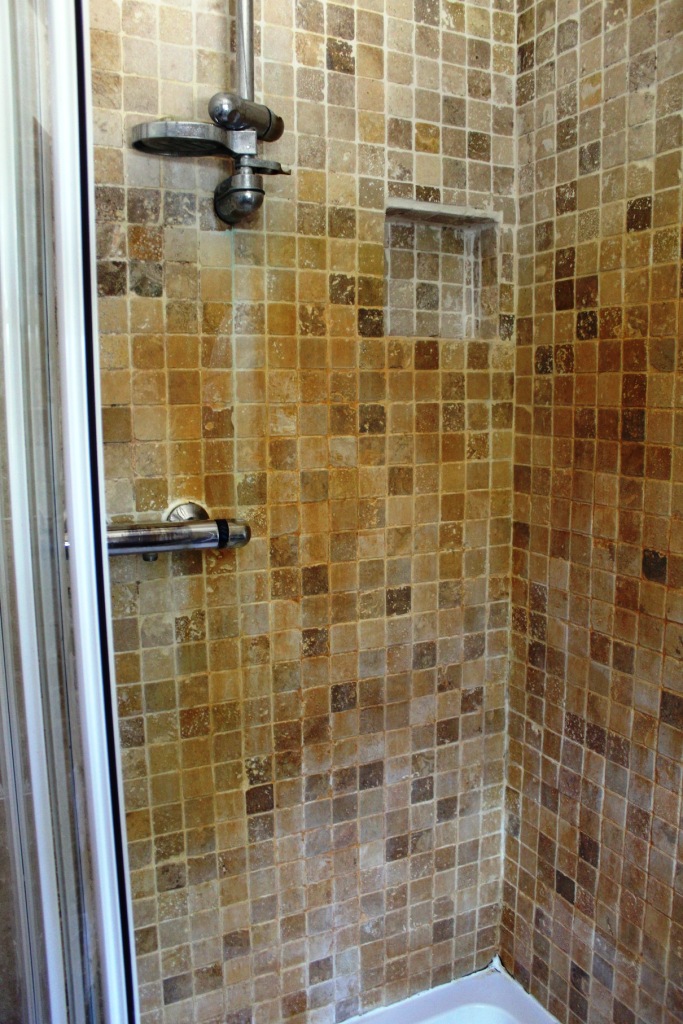
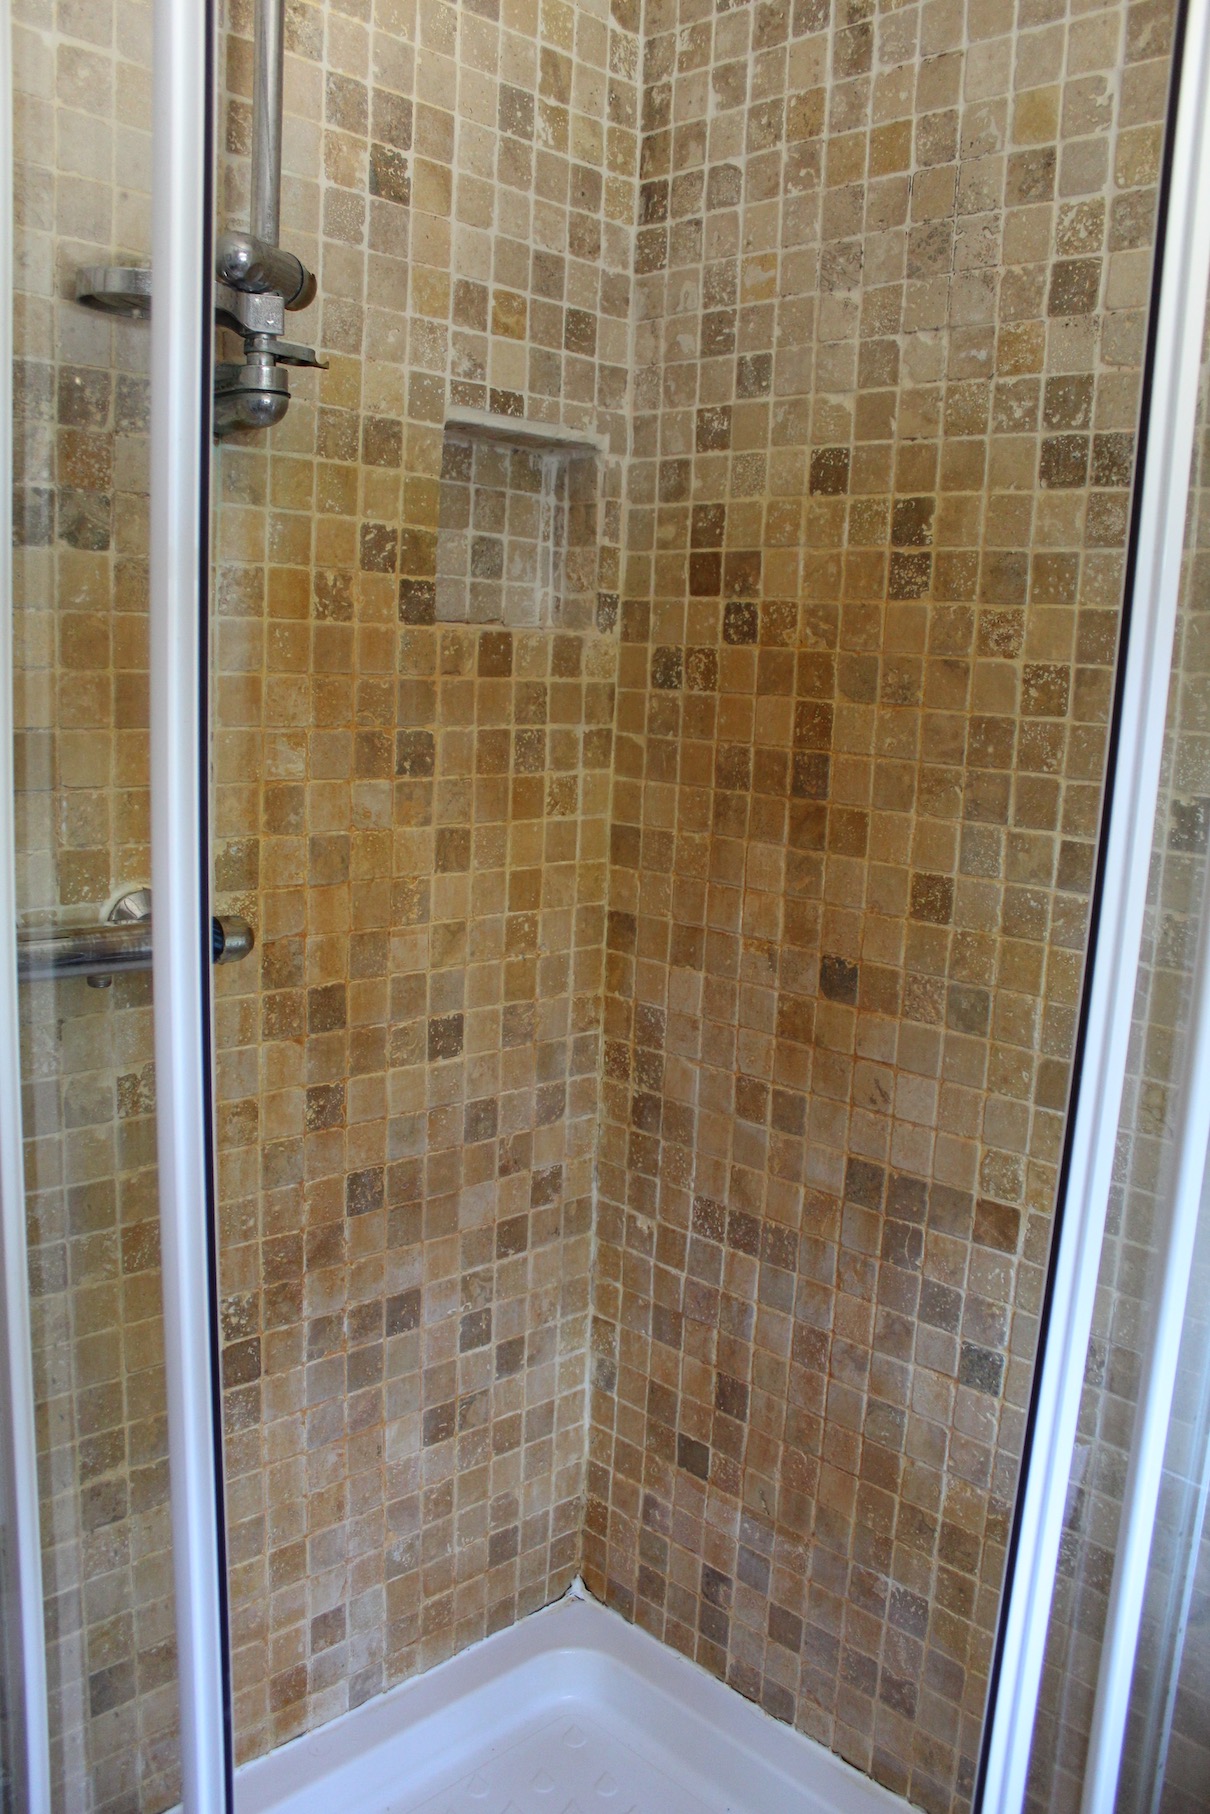
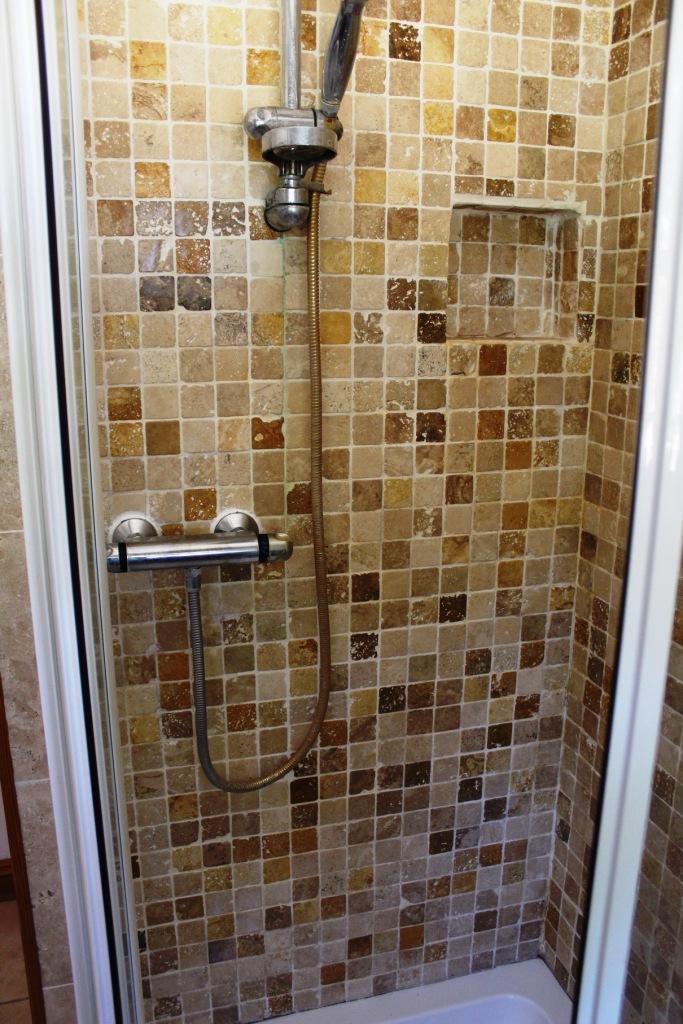
Mouldy Travertine Bathroom Renovation Telford

Badly Stained and Mouldy Travertine Tiled Bathroom Renovated in Telford

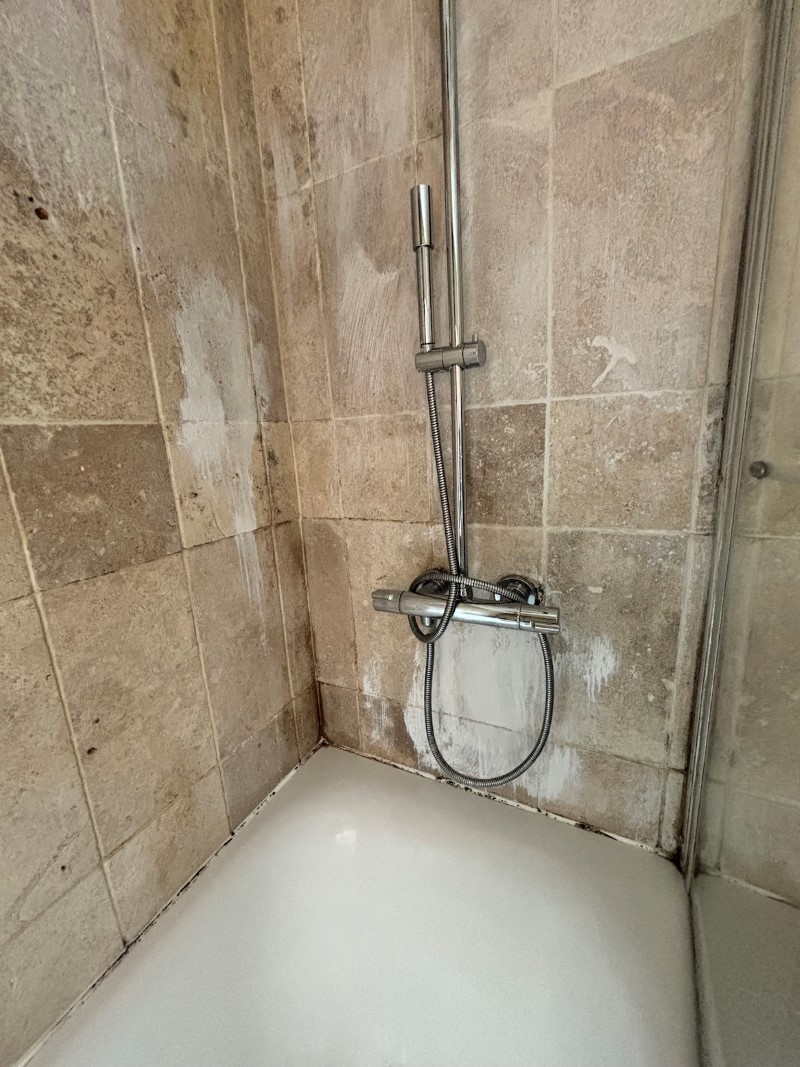
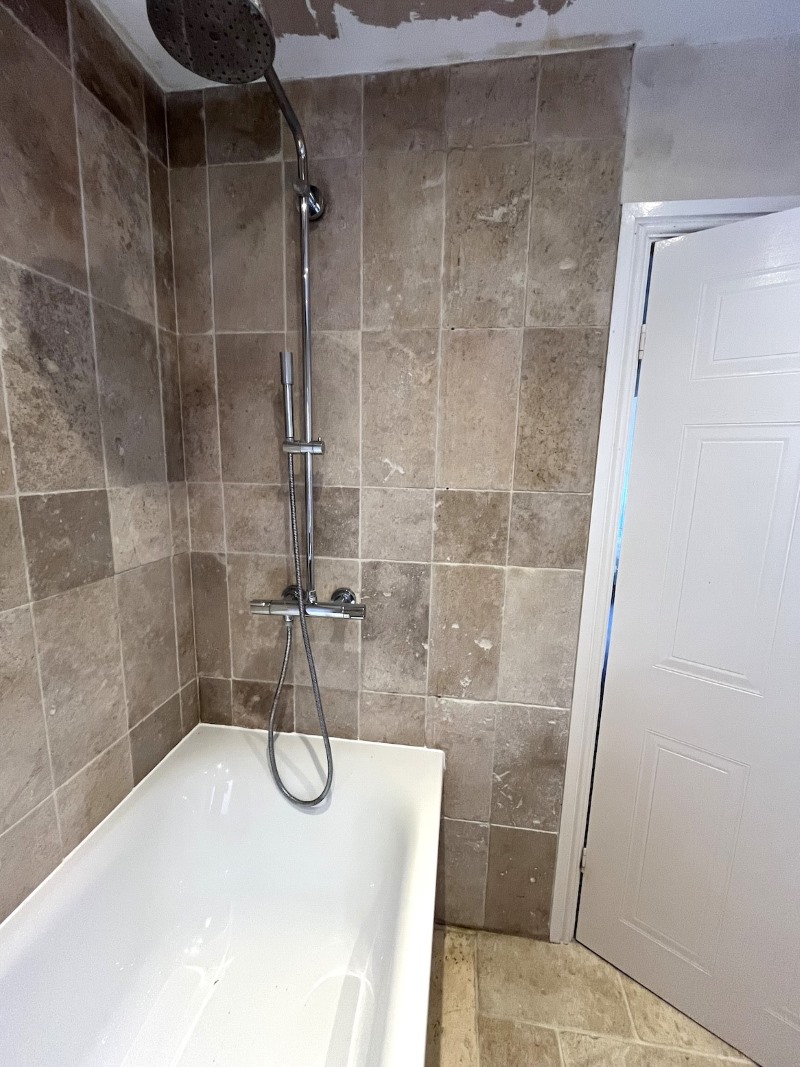
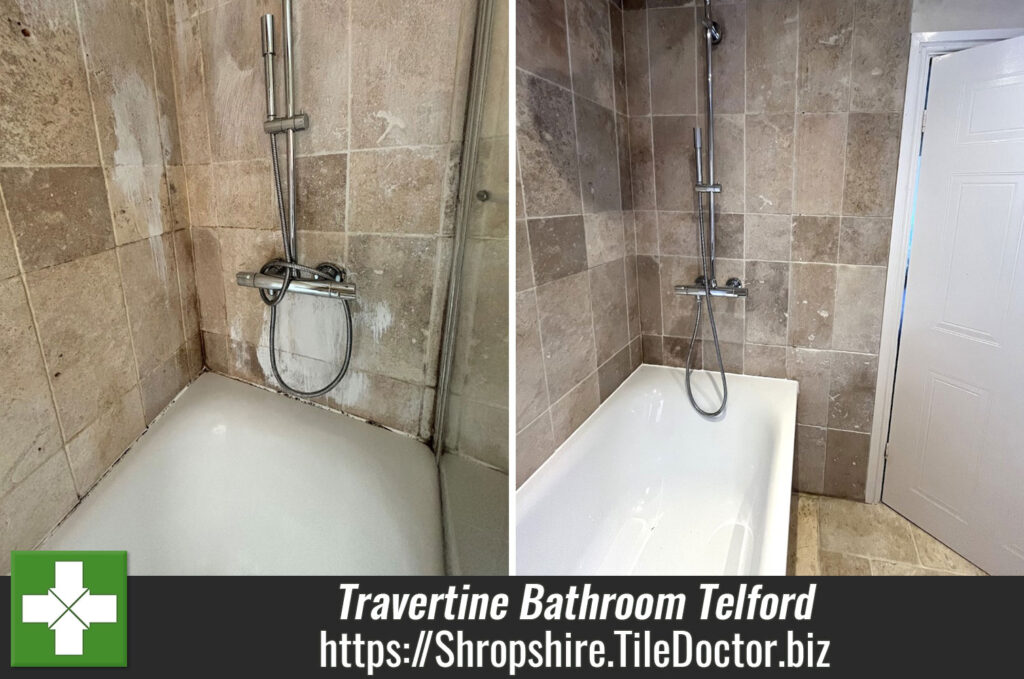
This Travertine tiled bathroom at a property in Telford had a bad mould problem and was in desperate need of renovation. Additionally, the tiles had been marked by water staining which was especially prevalent underneath the taps. The owner had decided it was high time to do something about it and I was asked to intervene.
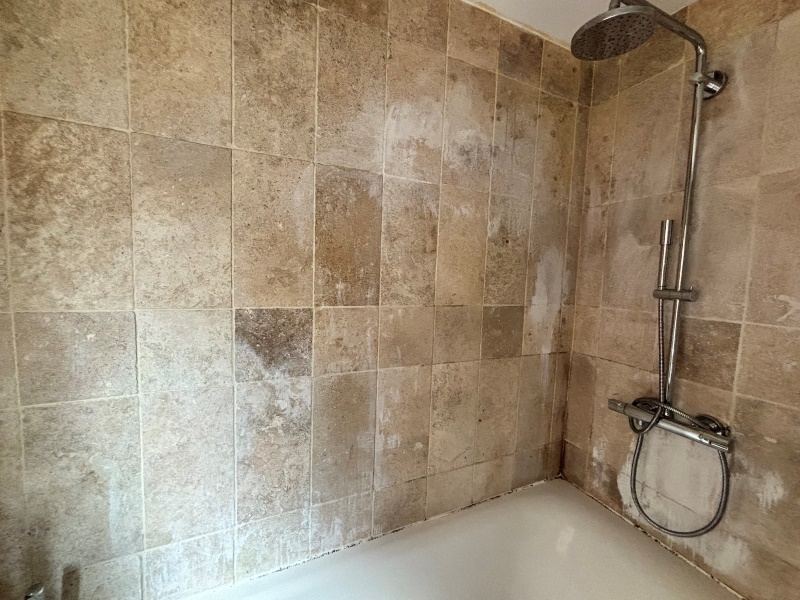
Travertine Bathroom Before Renovation Telford

Mould forms in damp warm spaces and can usually be avoided by increasing the ventilation in the room. Sometimes this is just a question of leaving a door or window open after showering, running the shower on cold after use can also help.
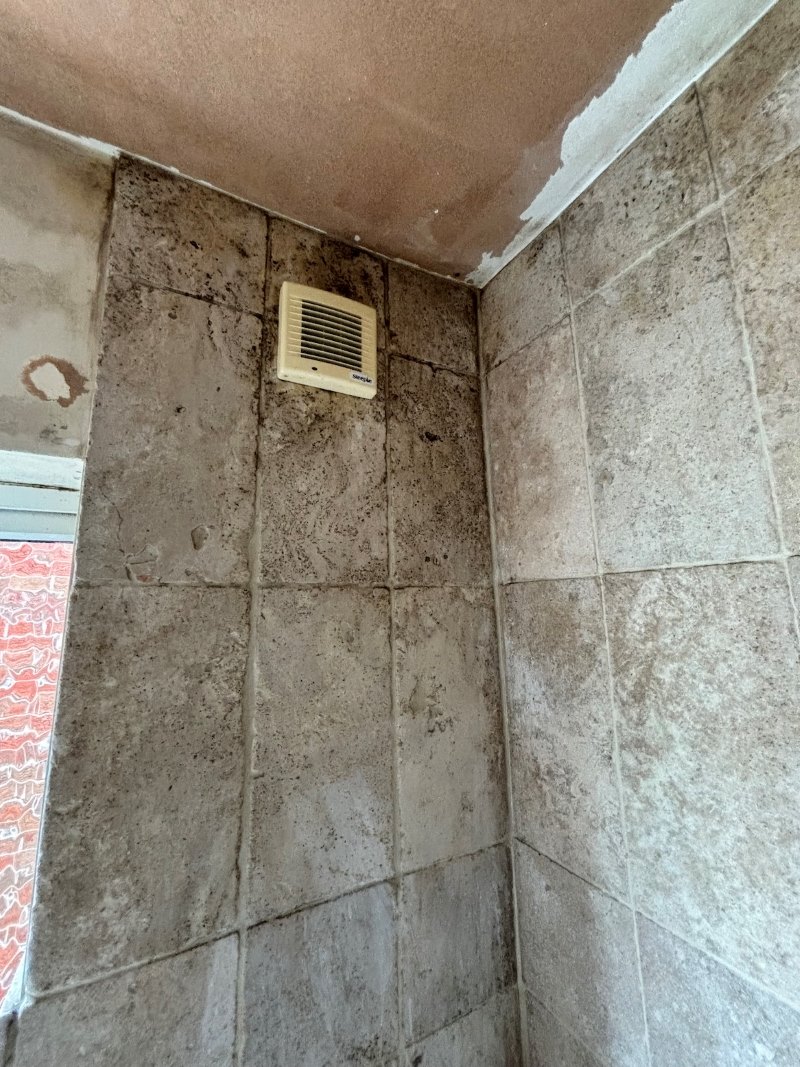
Travertine Bathroom Before Renovation Telford Travertine Bathroom Before Renovation Telford

I arranged a visit to review the problems and recommended that the Travertine wall tile and grout be deep cleaned, removing the mould in the process, and then sealed to make cleaning easier going forward. The silicone sealant around the bathtub was also affected and we find the easiest way to deal with this is to replace it. I re-assured the homeowner that this wouldn’t be a problem and worked out a quote for the renovation which was accepted and a date set for my return.

Cleaning a Travertine Tiled Bathroom

My first task was to start the tile and grout cleaning with a focus on removing the mould. Tile Doctor have a double action cleaner and mould remover designed for this situation called Tile Doctor Duo Clean, so I started with that. It has a trigger spray so it’s just a question of spraying it onto the wall tiles and leaving it to soak in for ten minutes. The atomiser mixes the active solution with air making it lighter and allowing it to stick easily to the vertical surface. Dwell time is important as this gives the product time to start breaking down the dirt and mould. The tiles were then scrubbed and the soiling rinsed away.

The next task was to restore the appearance of the Travertine tiling which had suffered from water staining and was dull and needed polishing to bring it back to life. To do this I used a range of six-inch diamond burnishing pads which come in different grits from 400 to 3000-grit. The pads fit a hand-held buffer and are run over each tile in sequence using only water for lubrication and rinsing after each pad. Work starts with the coarse 400-grit which further cleans up the stone and then you move onto the 800, 1500 and 3000 grit pads which slowly restores a polish to the Travertine.

When all this was done, we removed the mouldy silicone from around the bathtub and let the tiles dry off overnight.

Sealing a Travertine Tiled Bathroom

On my return on the following day, I applied new silicone sealant and when it started to go off, I sealed the tile and grout with three coats of Tile Doctor Ultra-Seal. The sealer soaks into the pores preventing contaminates from becoming ingrained there and ensures water runs off the surface easily.

Last step was to replace the silicone sealant with a fresh anti-mould version in White and this finished off the transformation of the bathroom.
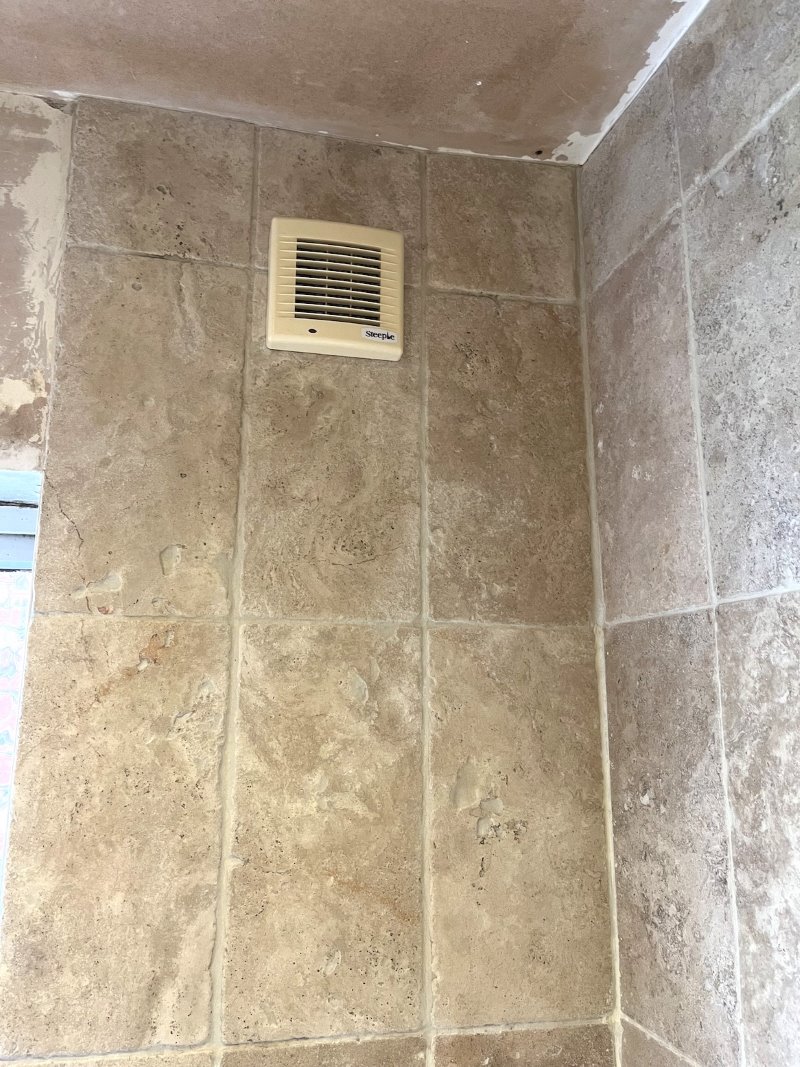
Travertine Bathroom After Renovation Telford Travertine Bathroom After Renovation Telford

Once complete the mould and staining was gone leaving the bathroom looking like a new installation, as you imagine my client was really pleased with the result and much relieved.
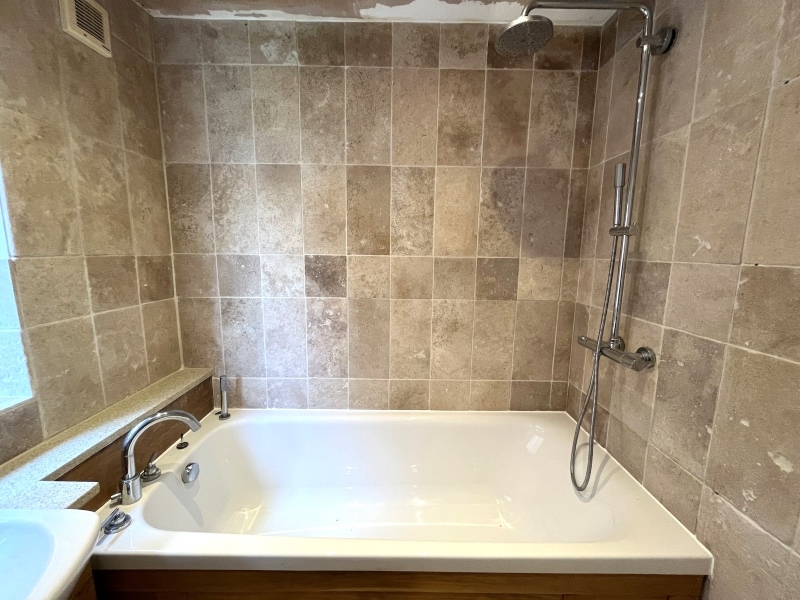
Travertine Bathroom After Renovation Telford

For the aftercare of sealed shower tile and grout I like to recommend Tile Doctor Aqua-Pro, it’s a mild cleaner that is sprayed onto the tiles. It has an effective yet Ph neutral formula that won’t impact the sealer which can be the problem with many of the more aggressive cleaning products you find in supermarkets.


Professional Bathroom Renovation Service in Shropshire

Badly Stained and Mouldy Travertine Tiled Bathroom Renovated in Telford Read More »

Quarry Tiled Floor Restoration Bayston Hill Shrewsbury

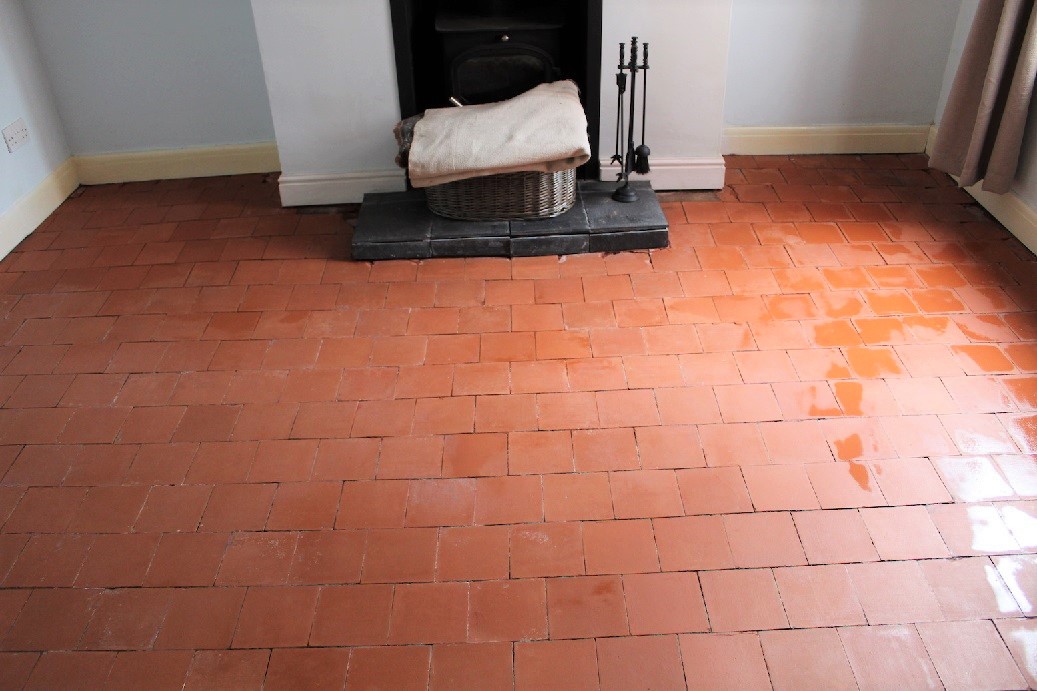
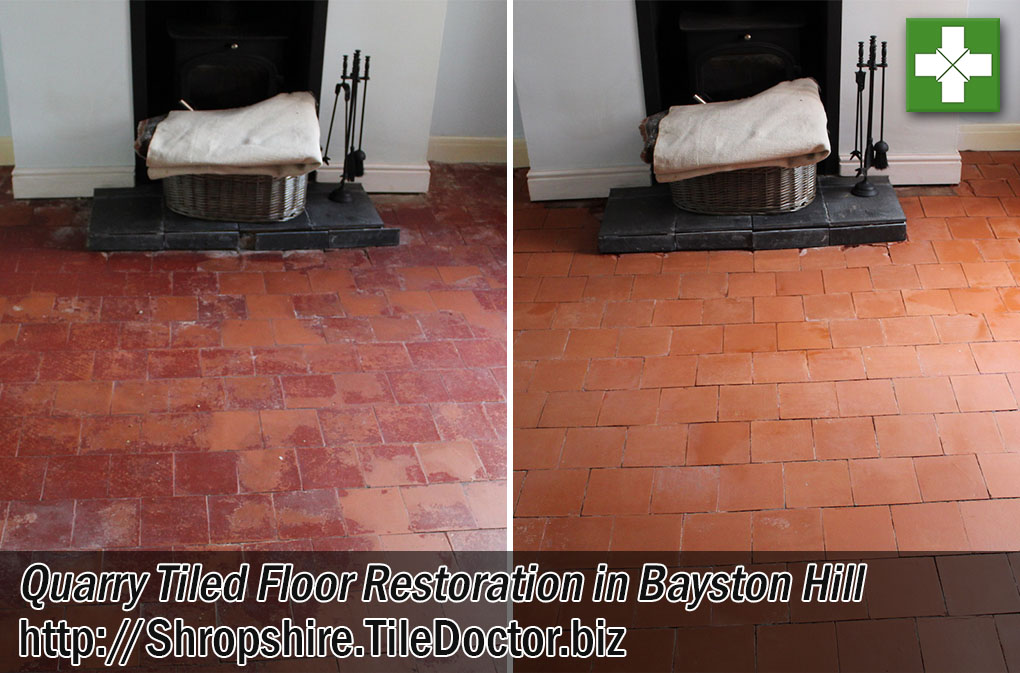
Quarry Tiled Dining Room Floor Restored in Bayston Hill Shrewsbury

This is the second part of the floor restoration work we completed at a property in Bayston Hill near Shrewsbury. This post concerns the restoration of a Quarry tiled floor in the dining room whereas the previous post dealt with the Victorian tiled hallway.

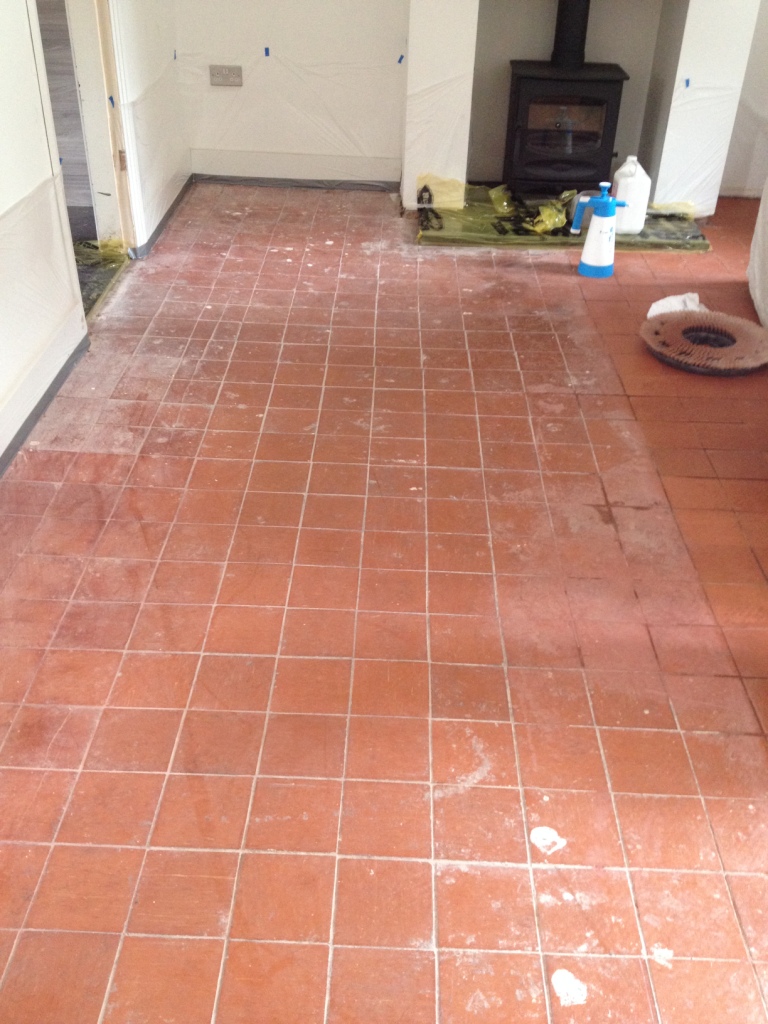
Quarry Tiled Floor Before Restoration Bayston Hill Shrewsbury

Unlike the hallway the hallway the tiles in the dining room where well fixed, although there were a couple of tiles missing by the door which had been replaced with cement. The only other problem was their appearance, it looked as though they had been painted with several layers of tile paint during in its long history and this was now looking very patchy.

For this floor we needed to source a few matching Quarry tiles to be fixed in the doorway and then give the whole floor a very deep clean making sure to remove what remained of the paint in the process. Finally apply a fresh seal to the Quarry tiles which would help the original and replacement tiles blend in.

Quarry Tiled Floor Before Restoration Bayston Hill Shrewsbury

Repairing a Quarry Tiled Hallway Floor

Work started by chopping out the cement in the doorway threshold so the replacement tiles could be laid. This had to be done very carefully so as not to disturb the existing tiles. Once done the resultant rubble was cleared out and the subbase brought up to the correct level.

Replacement Quarry tiles are not that difficult to find, naturally however each one needed to be cut to fit exactly which took a little time. I always buy more than I need to allow for breakages etc, tilers usually recommend buying 10% more than you need and then to keep the spares in case you need to replace some later. With the tiles nicely shaped to fit the last step was to secure them in place with fast setting adhesive and grout.

Quarry Tiled Floor During Restoration Bayston Hill Shrewsbury

Deep Cleaning a Quarry Tiled Hallway Floor

Once the tiles has set I was able to start the deep cleaning process for which I used the same process as the hallway tiles. In summary the Quarry tiles were sprayed with a strong dilution of Remove and Go which was left to soak in for around fifteen minutes before being scrubbed in using a rotary machine fitted with a Black pad. This generates a lot of slurry as the dirt and tile coatings are lifted out of the tile and into the cleaning solution; the slurry is then rinsed away with water and extracted off the floor using a wet vacuum. Once done the floor was inspected and then retreated as needed until I was satisfied it was as clean as possible.

Quarry Tiled Floor During Restoration Bayston Hill Shrewsbury

The next step was to give the tiles an acid rinse using Tile Doctor Grout Clean-up which is designed to remove old grout smears and salts from the tile. Salts can be a real problem on old Quarry floors with no damp proof membrane as there is nothing to stop salts being caried up through the tile from the subfloor and being left as white deposits as the moisture evaporates, a process commonly known as Efflorescence and quite common with old Quarry tiled floors.

Sealing a Quarry Tiled Hallway Floor

With both floors clean they were left to dry out for a week before I returned to apply the sealer. It’s important for tiles to be dry before sealing or the results can be patchy.

Quarry Tiled Floor After Restoration Bayston Hill Shrewsbury

For both floor I opted to use Tile Doctor Colour Grow which is an impregnating sealer that leaves a matt finish and works by occupying the pores in the tile protecting it from within. It’s also fully breathable so won’t prevent moisture rising through the tile and it contains a colour enhancer that will help improve the colours in the tile.

Quarry Tiled Floor After Restoration Bayston Hill Shrewsbury


Quarry Tiled Hallway Professionally Restored in Shropshire

Quarry Tiled Dining Room Floor Restored in Bayston Hill Shrewsbury Read More »

Victorian Tiled Floor Restoration Bayston Hill Shrewsbury

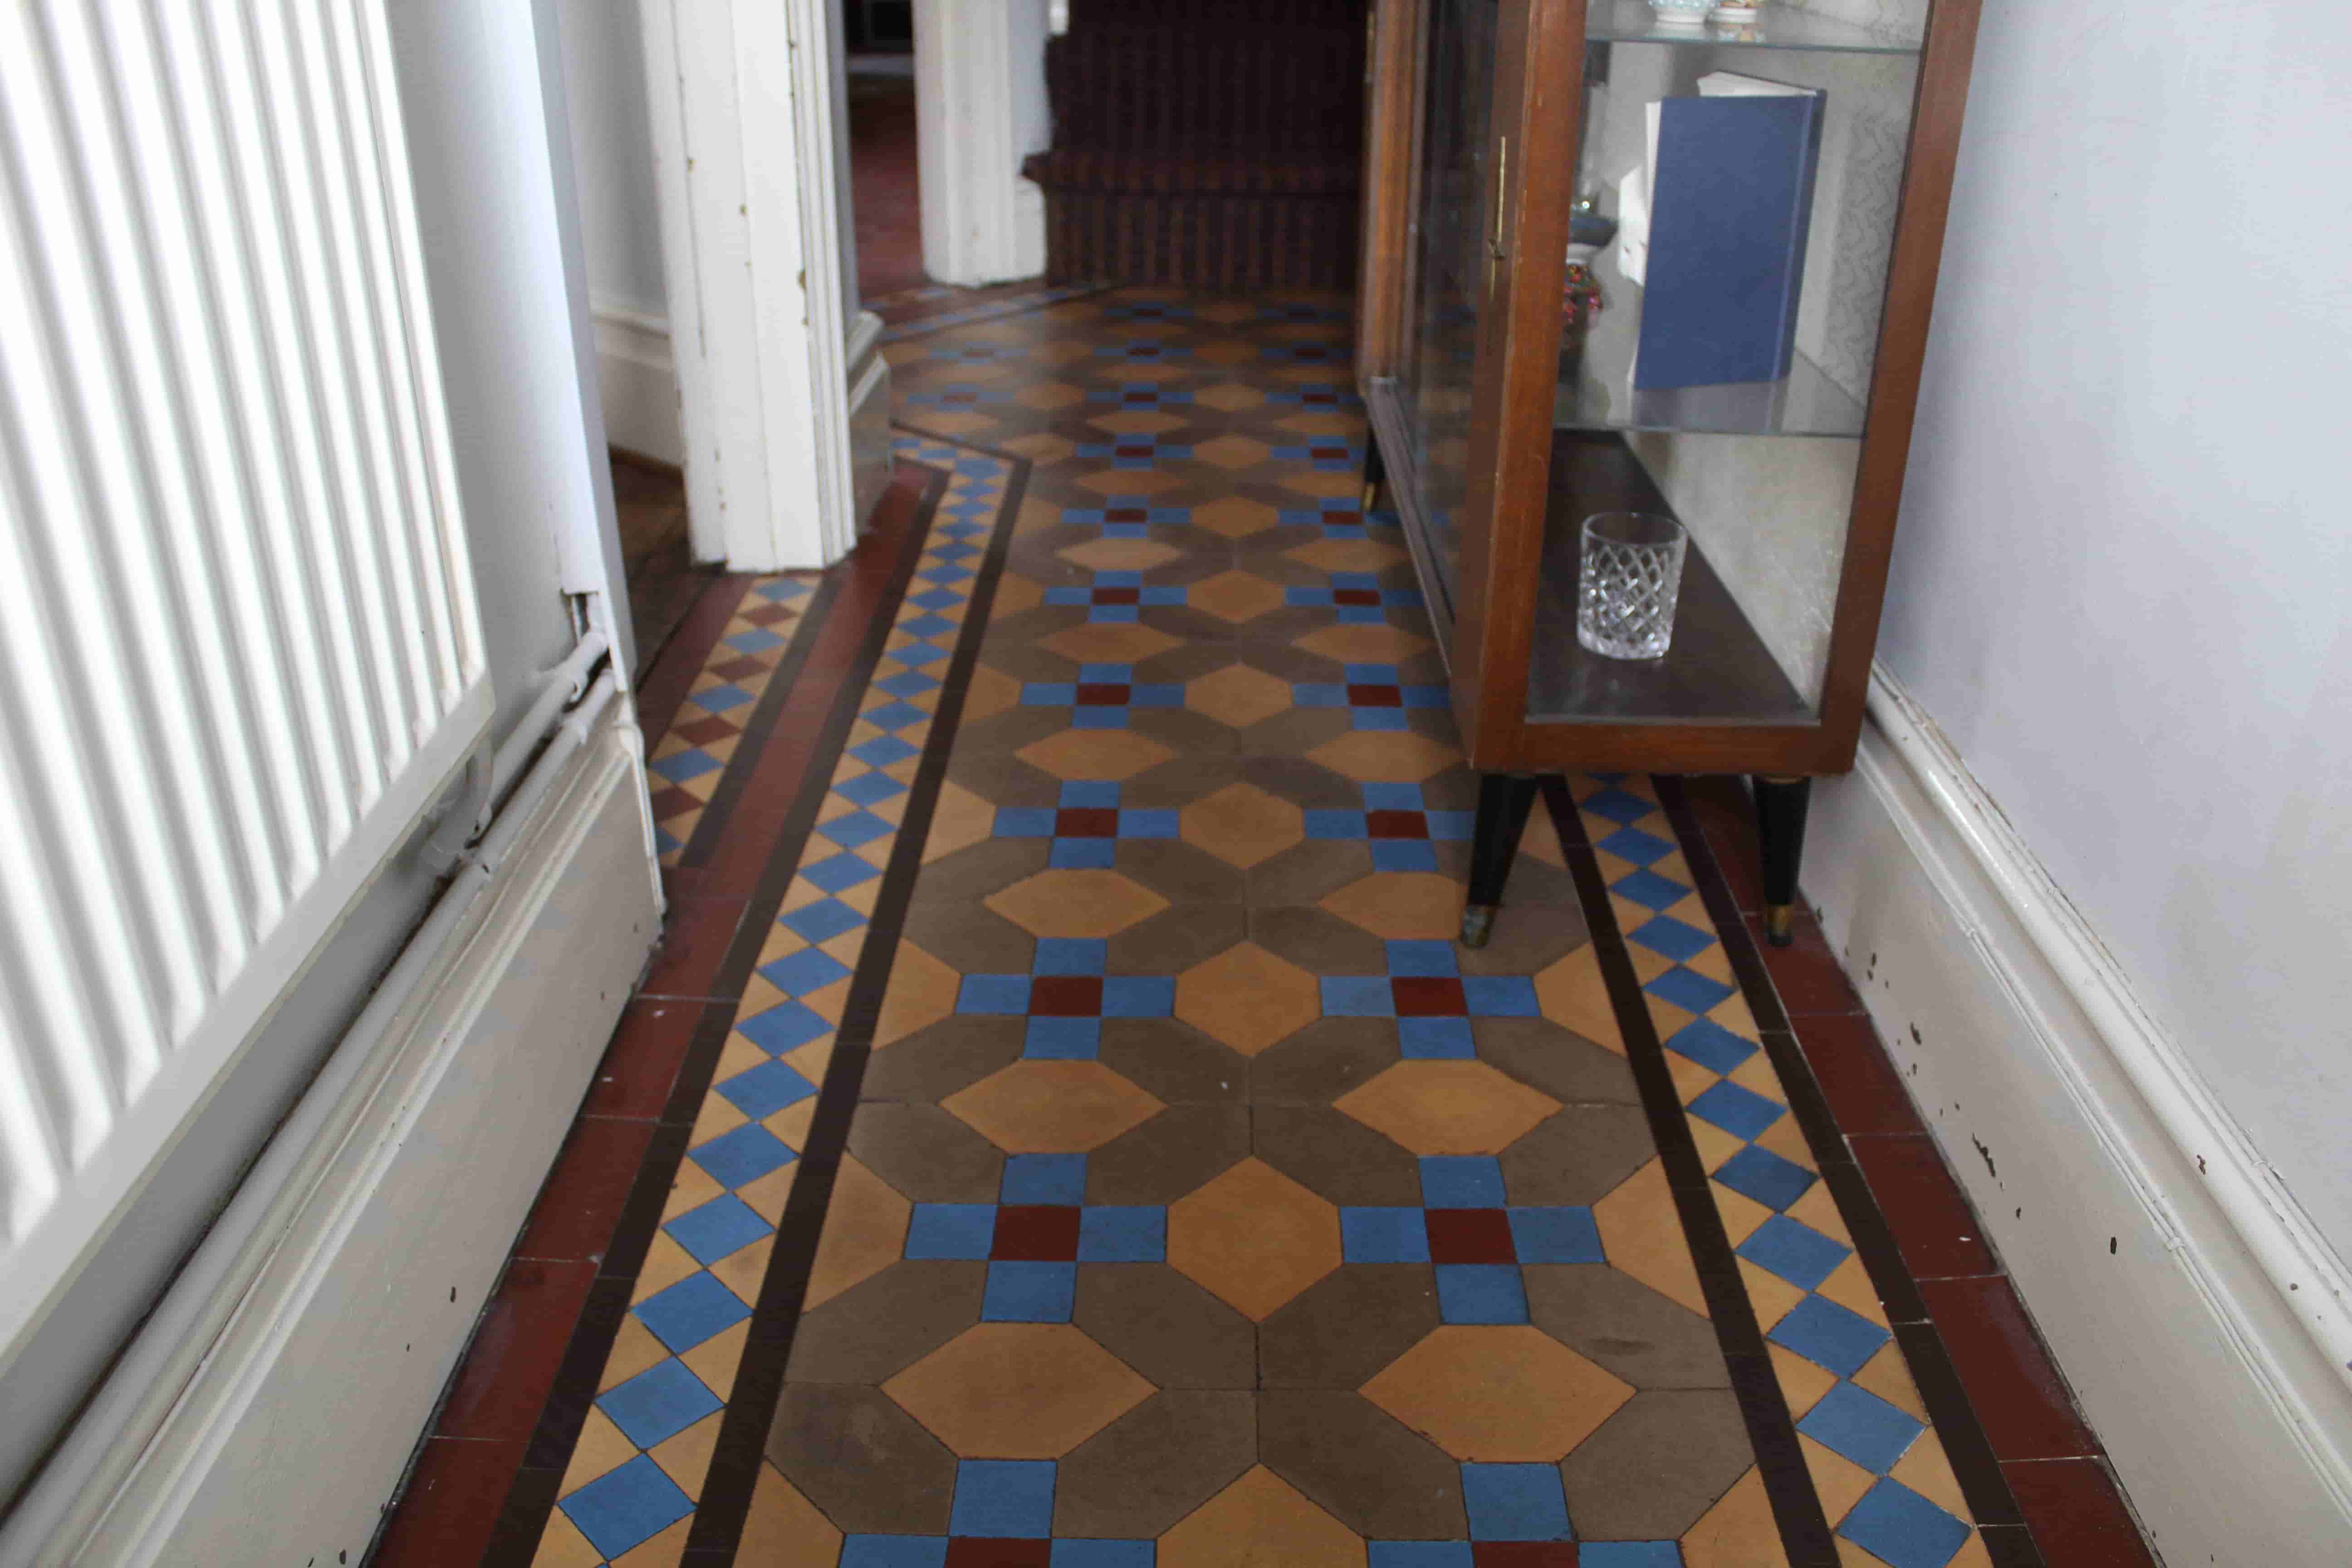
Loose Victorian Tiled Hallway Repaired and Renovated in Bayston Hill Shrewsbury

When the owner of this property in Bayston Hill near Shrewsbury contacted me about a Clean and Seal of their Victorian tiled hallway and Quarry tiled dining room floors. They mentioned a few loose tiles needed resetting, however, as you will see it turned out to be over 70% of the hallway floor tiles that were loose, additionally the Quarry tiles had been covered with several layers of floor paint.

This is one of the reasons why I rarely give a quote over the phone, happy to provide a rough estimate but if you want an accurate price for the work, I really must pay a visit to the property and survey the floor first. In the case both floors needed a lot of work to fully restore them so I’ve split this work history into two parts and will publish details on the restoration of the Quarry tiled floor in a separate article.

Victorian Tiled Floor Before Restoration Bayston Hill Shrewsbury

Except for the loose tiles the Victorian hallway was simply dull with ingrained dirt just needed a deep clean and then reseal to restore its appearance. Particularly noticeable where the light blue tiles within the geometric pattern which once cleaned would really shine.

Victorian Tiled Floor Before Restoration Bayston Hill Shrewsbury

Repairing a Victorian Tiled Hallway Floor

For best results I use a rotary machine to clean floor tiles however the floor would been to be intact before I could make use of that, so my first task was to re-fix the loose tiles which as mentioned earlier were quite significant. In-fact once I started to lift the loose tiles, that couple of tiles turned out to be more than half of the hallway floor. When they were fixed back, I grouted it and left the floor to dry overnight.

Victorian Tiled Floor During Repair Bayston Hill Shrewsbury Victorian Tiled Floor During Repair Bayston Hill Shrewsbury

Deep Cleaning a Victorian Tiled Hallway Floor

On the second day with the floor now solid I was able to progress the cleaning starting with the removal of old coatings and ingrained dirt in the tiles. I did this using a strong dilution of Remove and Go which was left to soak into the tiles for a while before being scrubbed in using a rotary machine fitted with a Black pad; the resultant slurry was then rinsed away with water and extracted off the floor using a wet vacuum.

Once done I treated the tiles to an acid wash using Tile Doctor Grout Clean-up which is designed to remove old grout smears and salts from the tile. Salts can be a real problem on old Victorian floors with no damp proof membrane as there is nothing to stop salts being caried up through the tile from the subfloor and being left as white deposits as the moisture evaporates, a process commonly known as Effloresence. Another advantage of give the floor an acid wash is that it neutralises the pH level of the floor following the use of alkaline cleaning products such as Remove and Go.

Sealing a Victorian Tiled Hallway Floor

The tiles must be dry before sealing and given all the washing and rinsing I had done to get the floor clean I decided to leave the floor for a whole week before returning to seal the tiles.

For this floor I opted to use Tile Doctor Colour Grow which is an impregnating sealer that leaves a matt finish and works by occupying the pores in the tile protecting it from within. It’s also fully breathable so won’t prevent moisture rising through the tile and it contains a colour enhancer that will help improve the colours in the tile.

Victorian Tiled Floor After Restoration Bayston Hill Shrewsbury

The deep clean and fresh sealer worked well and as hoped those light blue tiles really lit up the floor. Before leaving I took time to discuss aftercare cleaning and for this floor, I recommended Tile Doctor Neutral Cleaner which is a gentle but effective product that is safe to use on sealed tiles.


Victorian Tiled Hallway Professionally Repaired and Restored in Shropshire

Loose Victorian Tiled Hallway Repaired and Renovated in Bayston Hill Shrewsbury Read More »

Ceramic Tiled Floor Renovation Shrewsbury

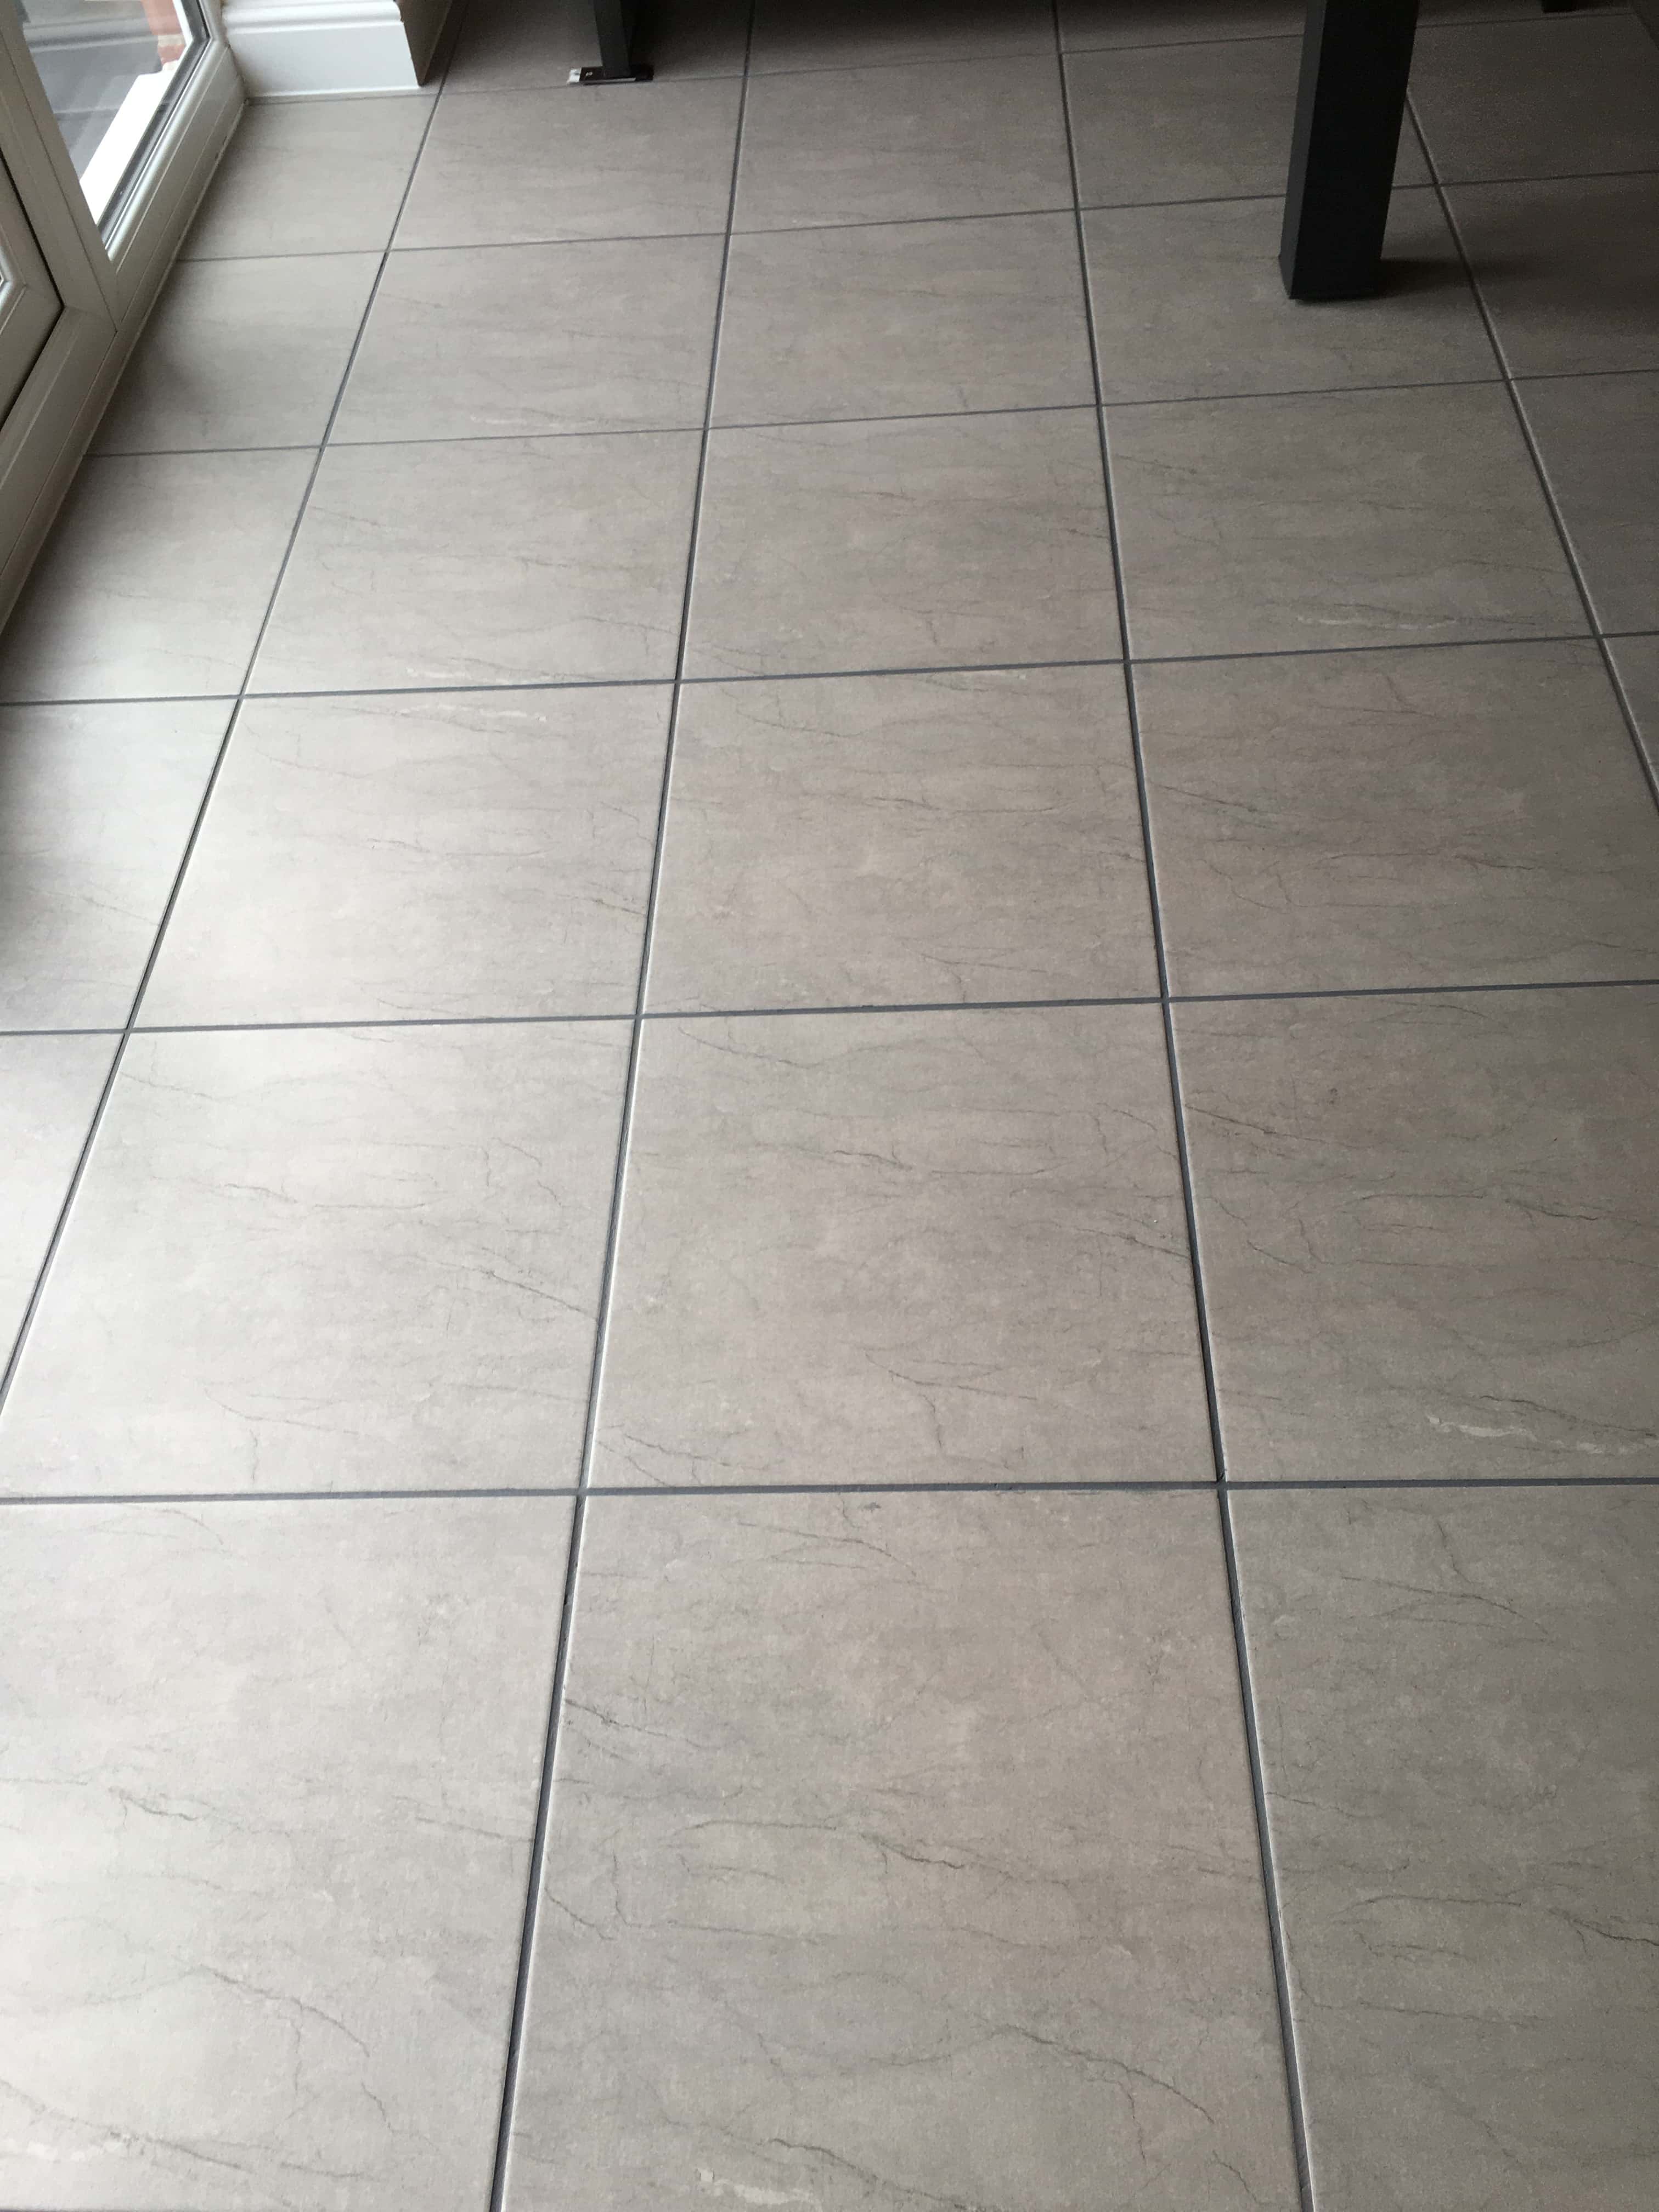
Renovating Patchy Grout on a Ceramic Tiled Floor in Shrewsbury

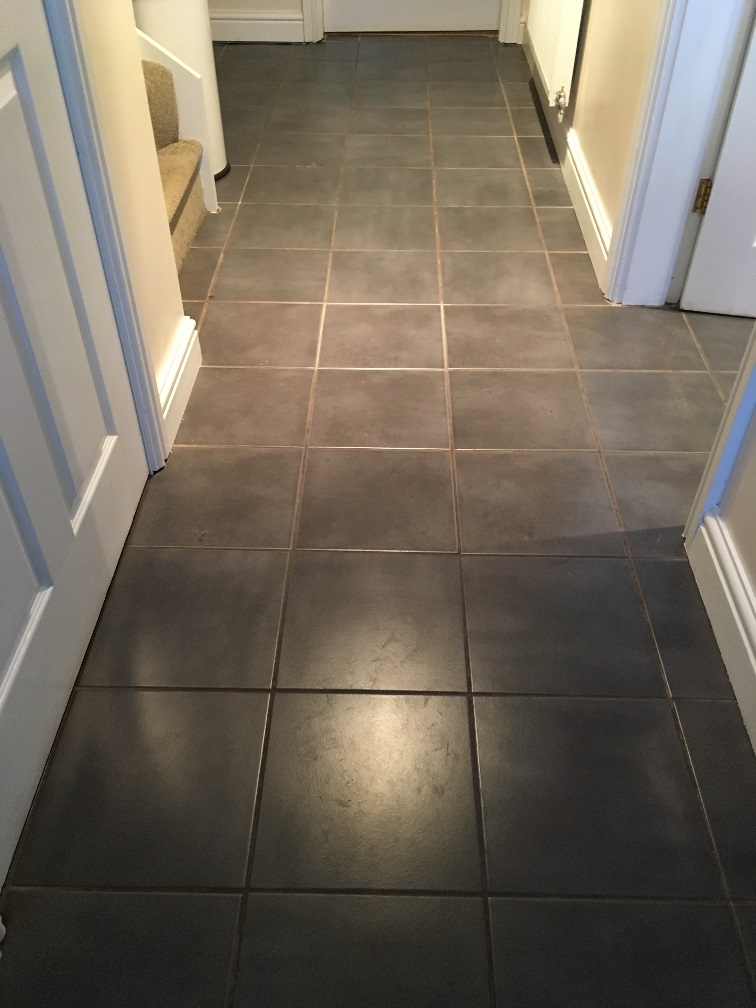
These pictures were taken at a five-year-old property in Shrewsbury where the entire ground floor had been laid with Ceramic tiles. The owner was mainly unhappy with the grout which after five years of use had become patchy in appearance. Grout is usually the biggest problem when it comes to Ceramic and Porcelain floors, the tiles themselves usually require very little maintenance, whereas the surface of grout is slightly porous and can be stained.

Ceramic Tiled Floor Before Grout Colouring Shrewsbury

I recommended deep cleaning the floor and then re-colouring it with a Charcoal Grey colourant, not only would this resolve the appearance issue, but the colourant also acts as a protective barrier over the grout making it easier to clean and will ensure it had a consistent appearance. The alternative would be to slowly rake out the grout and replace with new which given the size of the floor would take a long time, also it would probably become stained again so we would be back to square one. My client was happy with my quote and agreed to go ahead, so we booked in a suitable time to carry out the work.

Ceramic Tiled Floor Before Grout Colouring Shrewsbury

Cleaning a Ceramic Tiled Kitchen Floor

To clean the tile and grout I first sprayed on a medium dilution of Tile Doctor Pro-Clean then after ten minutes scrubbed it in with a black pad fitted to a rotary buffer machine. I then followed this up with a manual scrub of the grout as the pads can struggle to reach into the recess of the grout line. This action lifted the dirt out of the floor which was then rinsed away with water and extracted with a wet vacuum.

The next step was to prepare the grout for the colourant by scrubbing it with Tile Doctor Grout Clean-up. This is an acidic product that cleans the grout further and etches the surface of the grout to ensure a better bond with the colourant. The solution was then rinsed away again and removed with the wet vacuum. This process was repeated with more water to neutralise the floor and remove any trace of cleaning products.

Colouring the grout on a Ceramic Tiled Kitchen Floor

It was a large area, so I left the floor to dry off overnight and returned the following day to apply the Charcoal Grout Colourant. Applying the product is done with a small brush and any excess has to be cleaned off quickly before it dries which makes it quite a slow process. It certainly requires a steady hand and a lot of patience.

The Tile Doctor Grout Colourant is available in ten popular colours, so it is very versatile for all types of tiled areas. They also supply the Colourant in a kit form with a brush and bottle of Grout Pre-Treater so you have everything you need.

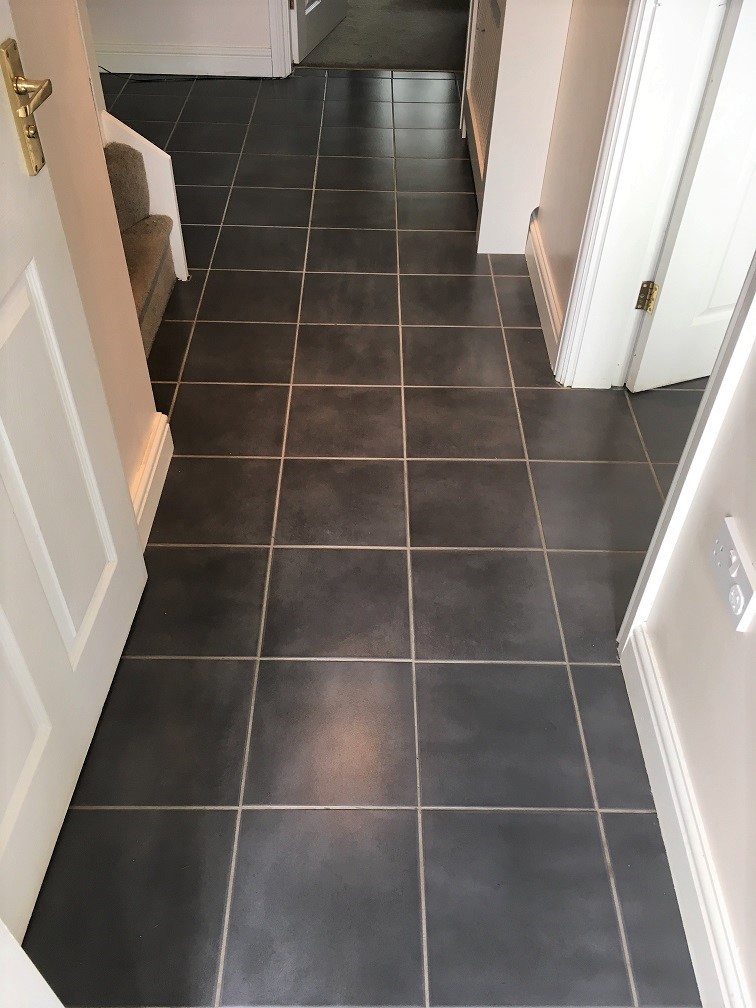
Ceramic Tiled Floor After Grout Colouring Shrewsbury

It was fairly tedious work, but the discoloured and patchy grout looked great after I was finished and my client was really happy with the result, they even left the following testimonial.

“Had the whole tiled ground floor of my house, cleaned, sealed and the grout darkened. Jozsef did a great job with no mess. I would highly recommend him”

Ceramic Tiled Floor After Grout Colouring Shrewsbury


Professional Renovation of a Ceramic Tiled Kitchen Floor in Shropshire

Renovating Patchy Grout on a Ceramic Tiled Floor in Shrewsbury Read More »

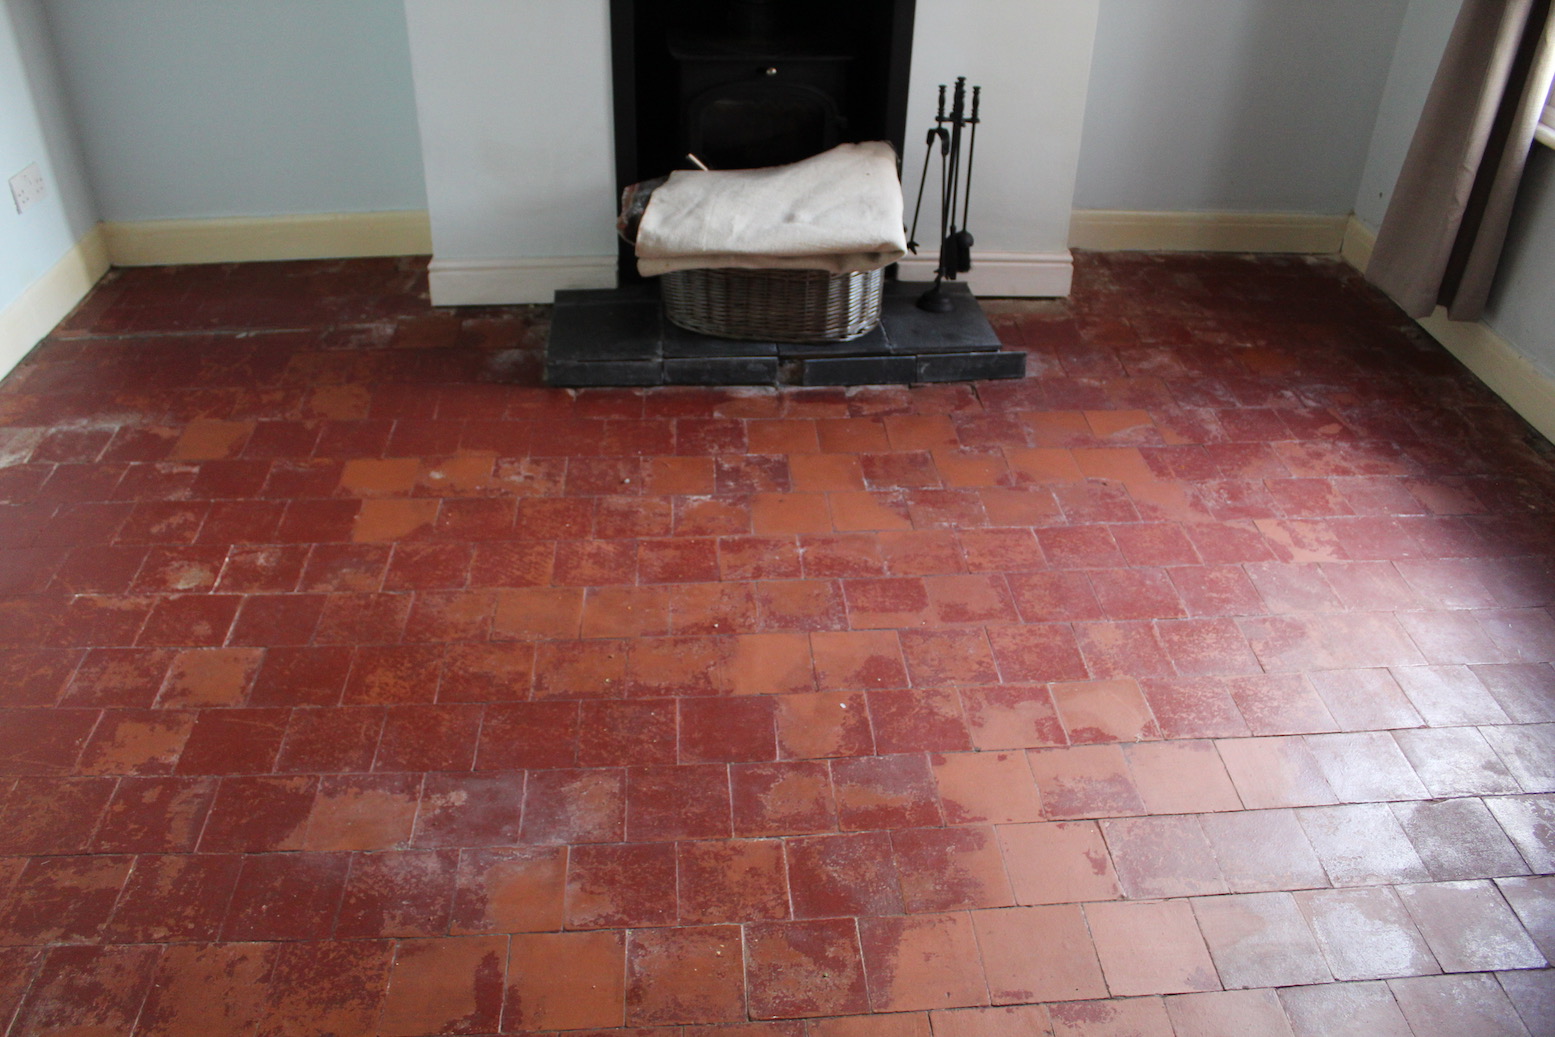
Quarry Tiled Kitchen Floor Restoration Oswestry

Restoring a Kitchen and Utility Quarry Tiled Floor in Oswestry

This property in Oswestry was being converted from offices back into a home and I was contracted to renovate the Quarry tiles in the Kitchen. The kitchen had Red and Black Quarry tiles and an ugly piece of concrete sat where the old cooking range was. It did not look good with the new layout of the kitchen, so they wanted the concrete dugout and red and black quarry tiles laid to match the existing. The utility room had the same red and black quarry tiles and the other half had older and larger format quarry tiles which they wanted to keep as a feature.

Quarry Tiled Kitchen Floor Oswestry Before Restoration Quarry Tiled Kitchen Floor Oswestry Before Restoration

Cleaning and Restoration of a Quarry Tiled Kitchen and Utility Floor

On day one my first step was to dig out the concrete from the area where the old range had been by breaking it up with a hammer drill fitted with a chisel attachment. The hole in the floor was then brought to the right level using a fibre reinforced levelling compound called Bal level max which sets in four hours. Once set I was able to tile with matching Quarry tiles that the client had provided together with others, I had managed to source from a reclamation yard. This process took up most of the first day and the newly laid tiles were left to set overnight.

Quarry Tiled Kitchen Floor Oswestry Before Restoration Quarry Tiled Kitchen Floor Oswestry During Repair

The utility floor was in the worst state and needed the most work. It had previously been covered with a self-levelling compound, probably so it could be covered in Vinyl. I removed the thin compound and then deep cleaned the floor. Apart from the self-levelling compound in the utility area, the entire area had a thick layer of plaster dust and residue from the building process.

Quarry Tiled Kitchen Floor Oswestry During Cleaning

To deep clean the Quarry tiles, I gave the floor a good scrub with a strong dilution of Tile Doctor Remove and Go and then after extracting the resultant soil with a wet vacuum I followed up with another scrub of Tile Doctor Grout Clean-up. These products which helped to deal with the plaster dust, the levelling compound, and the cement-based residue. For best results I leave the cleaning products on the tiles for a good ten minutes before scrubbing in with a black scrubbing pad fitted to a rotary machine. Once done the tiles were rinsed down with water and then the soil was extracted again. In a few areas I needed to repeat the process to get the floor clean.

Quarry Tiled Kitchen Floor Oswestry After Cleaning

Sealing a Quarry Tiled Kitchen and Utility Floor

I left the floor to dry off overnight and returned the next day to seal the tiles. The first job was to use the damp meter to ensure the floor was dry enough. If the floor is not dry, then the seal will not cure. I had chosen to seal with Tile Doctor Colour Grow, which is a solvent based sealer which is colour intensifying, it provides durable protection to the surface of the tiles as well as allowing the surface to breath. On this floor the colour of the red and black quarry tiles was really enhanced too. The floor was transformed, and the sealer really helped the old and new tiles blend in.

Quarry Tiled Kitchen Floor Oswestry After Sealing Quarry Tiled Kitchen Floor Oswestry After Sealing

The client was very happy with restoration and couldn’t wait to get the new kitchen completed.


Professional Restoration of a Quarry Tiled Kitchen and Utility in Shropshire

Restoring a Kitchen and Utility Quarry Tiled Floor in Oswestry Read More »

Painted Quarry Tiled Floor Before After Restoration Bayston Hill

Painted Quarry Tiled Floor Restored in Bayston Hill

The pictures shown are of a Quarry Tiled floor in the dining room of a property in Bayston Hill, Shrewsbury. Bayston Hill is a large village in central Shropshire around three miles away from the county town of Shrewsbury.

The client had recently purchased the property and decided to renovate the quarry tiled dining room floor by painting it with red tile paint. The floor had not been painted previously and due to its age did not have a damp-proof membrane installed in the sub floor. I suspect the lack of a membrane led to moisture rising through the tile only to become trapped under the layer of paint. The moisture built-up until it destabilised the bond between the tile and the paint causing to lift and peel away.

Painted Quarry Tile Floor Before Restoration Bayston Hill

I wouldn’t recommend painting a Quarry Tiled floor and clearly painting the tiles was not a viable option in this case. Looking for a solution the owner reached out to Tile Doctor to see if the Quarry tiles could be restored to their original condition. There was also an area by the kitchen door where there was a row of tiles missing in the threshold and just filled with concrete which needed restoring.

Painted Quarry Tile Floor Before Restoration Bayston Hill

Restoring a Quarry Tiled Dining Room Floor

I started the work with the repair which involved removing the concrete, cleaning up the area and relaying replacement tiles. Luckily, they had found spare tiles in one of their sheds, so I was able to use those.

Painted Quarry Tile Floor Before Restoration Bayston Hill Painted Quarry Tile Floor After Repair Bayston Hill

After the repair was done, I sprayed down a generous amount of Tile Doctor Remove and Go and then left it to work for about half an hour making sure that it wasn’t drying to the surface. After the dwell time I went over the floor with a rotary machine fitted with a black scrubbing pad. The combination of Tile Doctor Remove and Go and the scrubbing action removed most of the paint. I then repeated the process on the stubborn areas.

There were some old cement deposits on the tiles in places which I removed using Tile Doctor Grout Clean-up. I then rinsed the floor several times with water using a wet vacuum to remove the soil. I then left the floor to dry off for a week.

Sealing a Quarry Tiled Dining Room Floor

I returned the following week and first checked the floor was totally dry using a moisture meter. The readings were good, so we were ready to seal. I selected to use a couple of coats of Tile Doctor Colour Grow. This is a solvent based sealer that provides durable surface protection as well as allowing the surface to breath which is important on this floor as it has no damp proof membrane. It provides a colour intensifying finish which enhanced the natural colour beautifully.

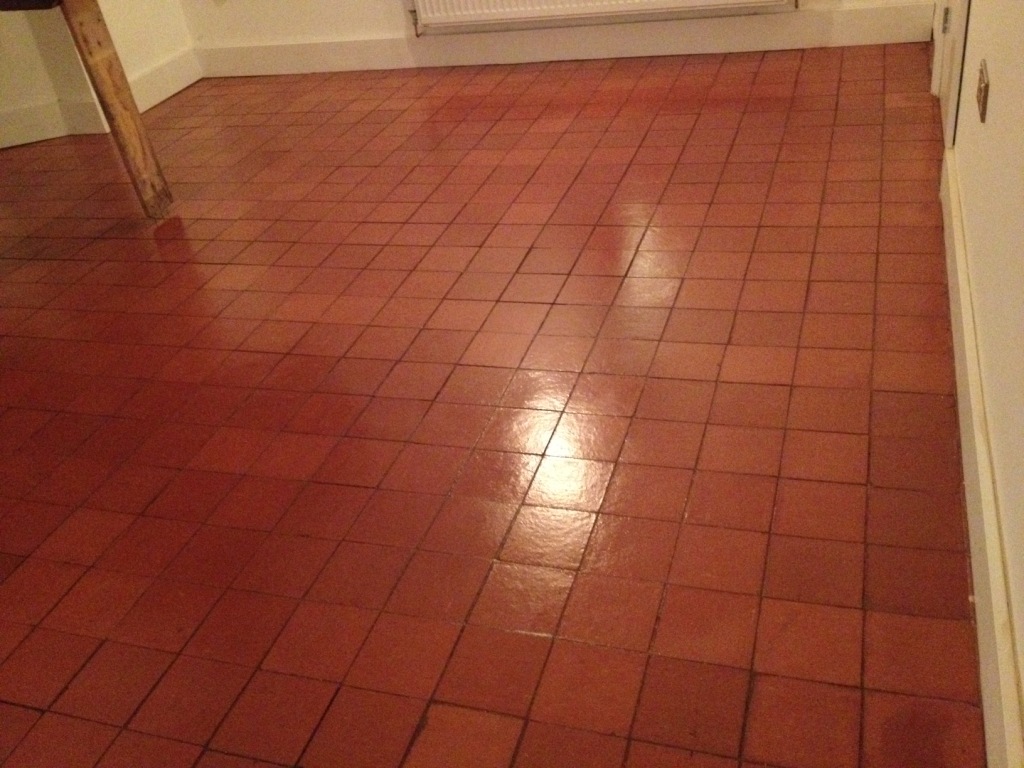
Painted Quarry Tile Floor After Restoration Bayston Hill

The client was very happy with the new floor and certainly pleased to see the back of the paint that they had applied. The floor now had the natural finish that was in keeping with the age of the property.

Painted Quarry Tile Floor After Restoration Bayston Hill


Professional Restoration of a Quarry Tiled Dining Room in Shropshire

Painted Quarry Tiled Floor Restored in Bayston Hill Read More »

Porcelain Floor Tile Before After Epoxy Grout Haze Removal Telford

Epoxy Grout Haze Removed from New Porcelain Floor in Telford New Build

The photos below are of a Polished Porcelain tiled floor at a house in the new Telford Lawley Village development. When the house was built my customer had specified large format White glazed Porcelain floor tiles on the ground floor and had insisted on the use of a matching white Epoxy Grout. The developer agreed to lay the tiles but refused to use Epoxy Grout (which is very resilient but also tricky to work with). As a result, the customer hired someone else to grout the floor.

Porcelain Tiled Floor Before Epoxy Grout Haze Removal Lawley Village Telford

Epoxy Grout is notoriously difficult to work with and unfortunately the tiler was unable to remove all the grout residue from the surface of the Porcelain tiles and ruining their appearance. The tiler tried to remove the grout residue but ended up discolouring all the skirting boards instead. The customer was out of time at this point and had to move in, but the floor looked a right mess as is clearly visible on the before pictures on this page. Having given up on the tiler they decided to call Tile Doctor.

Porcelain Tiled Floor Before Epoxy Grout Haze Removal Lawley Village Telford

Fortunately for the customer we are very familiar with this issue and have been resolving problems like this for some time. After discussing the problem on the phone, I paid the customer a visit to take a close look at the problem and after running a few tests I was confident I could fix it for them. We agreed a price and I arranged a time to return to complete the work.

Cleaning a Polished Porcelain Tiled Hallway Floor

To break down the polymers in the epoxy grout I first applied Tile Doctor Remove and Go which was left for approximately fifteen minutes before agitating it with a black scrubbing pad fitted to a rotary floor machine. This process removed most of the grout haze but to get it looking 100% I swapped the black pad to a 3000-grit diamond burnishing pad and polished the tiles using a little water sprayed onto the tile. This is a very fine polishing pad and brings up the finish on the Porcelain tiles a treat.

Once that was done, I inspected the floor again looking for stubborn areas and then spot treated those areas by hand with a repeat of the same process and a scraper. The tiles were factory sealed so once I was happy all the grout haze was gone the job was finished.

Porcelain Tiled Floor After Epoxy Grout Haze Removal Lawley Village Telford Porcelain Tiled Floor After Epoxy Grout Haze Removal Lawley Village Telford

For aftercare and keep the floor looking pristine I recommended they use Tile Doctor Neutral Tile Cleaner. It’s easy to use and comes in concentrated form so you only need a small amount, it has a nice fresh smell. They could use household cleaners, but they are likely to leave a residue and leave smears on the polished surface

The client was very happy that I saved the floor for her, it now looked how she had imagined it and was in keeping with the rest of the stunning new house. She left the following testimonial for me, which is always a delight. They now just needed to clean up the skirting boards, which may need a rub down and a lick of paint.

“Very professional manner. Excellent job. I am more than pleased. Edith K.”


Professional Restoration of a Polished Porcelain Tiled Hallway in Shropshire

Epoxy Grout Haze Removed from New Porcelain Floor in Telford New Build Read More »

Quarry Tiled Basement Floor Before After Restoration Llangollen

Quarry Tiled Basement Floor Renovated at old Bank in Llangollen

This Quarry Tiled floor was discovered in the basement of the old HSBC Bank building in Llangollen which is a small market town in Denbighshire, Wales. Close to my county of Shropshire, Llangollen is located on edge of the Berwyn mountains on the nestled on the River Dee in an area of outstanding natural beauty and so a lovely place to work.

Basement Quarry Tiled Floor Before restoration Llangollen

After HSBC moved out the property was bought by Whitewater Active who are an outdoor pursuits company that will be using the building as their local base of operations. The company offers a mix of outdoor activities and the property has been converted into accommodation, offices for the business and a cafe.

The area we were interested in was at the basement which they were planning to use as a team meeting room and the owner was keen to have it restored and looking its best for his staff. The floor was tiled with 9″ x 9″ Red and Black quarry tiles which as you can see from the photographs were in a sorry state. The room had a massive fireplace which unfortunately none of my pictures show but the tiles were damaged in front of it as someone at some point had likely used it for chopping firewood. The repair was quoted for, but as neither I nor him were able to source 9″ x 9″ black quarry tiles that were 1 1/2 ” thick, we decided to leave it as it was for now. They were happy with the quote I gave them, and we agreed a date to go ahead.

Basement Quarry Tiled Floor Before restoration Llangollen

Cleaning a Quarry Tiled Basement Floor

I gave the floor an initial clean with Tile Doctor Pro-Clean which was diluted and then sprayed onto the tiles, it was left for ten minutes and then scrubbed in with a black pad fitted to a rotary floor buffer. The resultant slurry was then rinsed off with water and extracted with a wet vacuum.

With the surface dirt removed it was clear that more work was going to be required to remove the plaster dust and concrete residue that marked the tiles. To tackle that I used Tile Doctor Grout Clean-up which is an acidic product that we normally use to remove excess grout. Using the same process as for the Tile Doctor Pro-Clean I had to go over the worst areas three times before I was satisfied the floor was clear and as clean as it could be.

After rinsing and extracting one last time I dried the floor as much as possible with the wet vacuum and left it to completely dry off overnight.

Sealing a Quarry Tiled Basement Floor

The next day I returned, checked the floor was dry with the moisture meter and then sealed the floor with a couple of coats of Tile Doctor Colour Grow. This is a lovely sealer that enhances the colour, allows the floor to breathe and will also ensures that the floor is well protected. Using a breathable sealer on old floor likes these where no damp proof membrane is installed as it allows moisture from the sub floor to pass through the tile and evaporate. Without the ability to evaporate moisture can build-up and spread to the walls where it can cause rising damp.

Basement Quarry Tiled Floor After restoration Llangollen

As you can see from the after photographs the renovation went very well and the colour change was pretty dramatic. The client was very happy with the transformation and couldn’t wait to get the furniture in and hold his first team meeting.

Basement Quarry Tiled Floor After restoration Llangollen


Professional Restoration of a Quarry Tiled Basement Floor in Shropshire

Quarry Tiled Basement Floor Renovated at old Bank in Llangollen Read More »

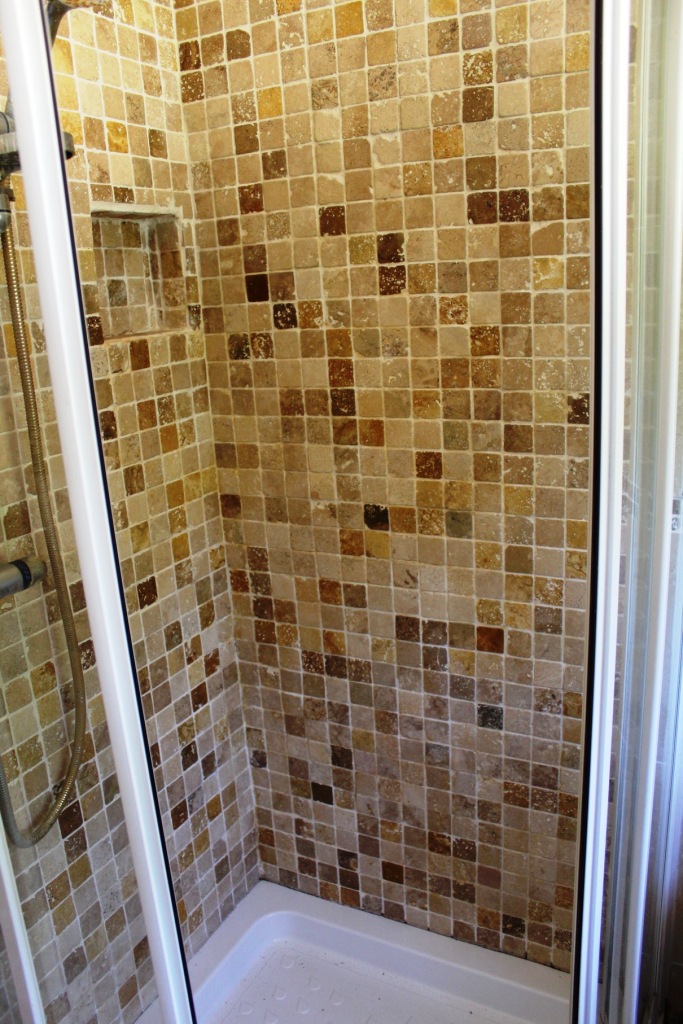
Mosaic Marble Shower Tiled Renovation Church Preen

Rust Stained Marble Mosaic Shower Tiles Renovated in Church Preen

We were contacted by a homeowner near Shrewsbury about the Marble wall tiles in their shower which were looking particularly grubby. They had tried to clean the area with a multitude of household products but were unable to improve their appearance and had decided to call in some professional help.

I went over to do a site visit, run some tests and recommend a solution, I like to do this where possible as it ensures I can provide an accurate quote and it also gives me an opportunity to demonstrate a workable solution. The tiles were the small two inch square Marble Mosaics which from my point of view means there’s a log of grout to clean.

Marble tiled shower before Cleaning Church Preen

More importantly whilst there I discovered their water is pumped up from a well and the water is rich in Iron deposits. You can see on the picture where the water has dried on the walls and then the Iron deposits have turned rusty resulting in a large rust stain.

The property was in the old village of Church Preen which a small Hamlet in Shropshire which only has around 30 properties, it is approximately 12 miles from the county town of Shrewsbury.

Marble tiled shower before Cleaning Church Preen

Cleaning Rust Stained Marble Shower Tiles

Normally I would remove the iron and rust deposits with an acid-based product such as Acid Gel or Grout Clean-up but Marble is acid sensitive and doing so would etch and damage the tiles. So, to work around this problem I selected to use Tile Doctor Rust Away which worked really well. This product is an effective ready to use cleaner specifically designed to remove rust stains particularly when it has become heavily embedded. In the pictures it is clearly visible how the solution turns purple when it reacts to the rust and iron deposits.

Marble tiled shower during Cleaning Church Preen

After the rust was removed, I set about cleaning the Marble tile and grout with Tile Doctor Oxy-Gel which being a gel sticks well to wall tiles allowing for a longer dwell time. After ten minutes the solution was scrubbed into the tile and grout by hand and then rinsed off with water. I repeated this process a couple of times where necessary until I was satisfied the tile and grout were as clean as could be and then rinsed the tiles down thoroughly to ensure all any traces of cleaning product has been removed. Once done the Marble tile and grout looked so much cleaner.

Sealing Mosaic Marble Shower Tiles

It was a hot day and with a little encouragement from my air mover I was able to dry out the tiles and grout quite quickly as verified by testing with a damp meter. This meant I could complete the job in one day without the need for any additional drying time.

I sealed the Marble and grout with two coats of Tile Doctor Colour Grow which is an impregnator that seeps into the pores of the stone intensifying the natural colours and providing durable protection. With a fresh sealer in place water now runs off the shower wall and no longer accumulates on the tile where the Iron in the water can cause staining as it rusts.

Marble tiled shower after Cleaning Church Preen

They were over the moon with their revamped shower, it now looked much more inviting for them to use and less embarrassing when guests come to stay.

Before leaving we discussed aftercare and I recommended the use of Tile Doctor Aqua-Pro for general cleaning, it’s a pH neutral product so its safe to use on sealed surfaces. Also I suggested that should the find water starting to collect on the shower wall after use it’s wiped off with a squeegee.

Marble tiled shower after Cleaning Church Preen


Professional Renovation of Stained Marble Shower Tiles in Shropshire

Rust Stained Marble Mosaic Shower Tiles Renovated in Church Preen Read More »

Travertine Floor Before After Polishing Priorslee

Travertine Tiled Floor Cleaned, Polished and Filled in Priorslee

This Travertine tiled floor was installed in the Kitchen, Hallway and downstairs WC at a property in the Telford suburb of Priorslee. It has been some time since it was last sealed and the sealer had now worn-down allowing dirt to become ingrained in the stone, as a result the floor now looked flat and un-interesting. The floor also had several holes that were trapping dirt and needed filling.

Travertine Floor Before Polishing in Priorslee Telford

I surveyed the floor and recommended a process called burnishing which uses a series of abrasive pads to restore the polished appearance of the stone. Once done the floor would be sealed to protect it from dirt and staining going forward. The owner agreed my quote and we set a date for my return to restore the appearance of the floor.

Travertine Floor Before Polishing in Priorslee Telford Travertine Floor Before Polishing in Priorslee Telford

Cleaning Travertine Floor Tile and Grout

Before starting the cleaning process, I spent time protecting the woodwork and removing the kickboards from underneath the kitchen units.
Then working in sections I gave the floor a general wash to remove any grit and clean the grout. Focusing primarily on the grout I applied a medium dilution Tile Doctor Pro-Clean and left it to soak in. The solution was left to dwell for roughly ten minutes in order for it to digest the dirt and remaining sealer. I then used a deck brush on the tiles and a stiff grout brush along the grout lines to scrub the solution in and release the dirty. The floor was then rinsed with water and the now soiled cleaning solution was removed using a wet vacuum.

The next step was to burnish the stone using a set of diamond encrusted pads which are applied to the floor using a rotary floor buffer in sequence from coarse to super fine. First using the 400-grit coarse number 1 pad we put some clean water on the floor and using our rotary machine slowly burnished the area making sure that we passed over each tile 4 times, this coarse pad cuts into the surface grime of the floor and also removes sealers. The resultant soiled water is rinsed away with clean water which in turn is removed using a wet vacuum. This process is then repeated with the 800-grit medium and 1500-grit fine pads, rinsing between each pad until a nice polish is built up on the tile. The floor is then given a final rinse and once we were satisfied that all the slurry had been removed.

Last job for the evening was to inspect the floor and fill the small holes using grout in a colour that matched that of the Travertine. The floor was then left to dry off overnight.

Polishing and Sealing Travertine Floor Tiles

On day two I continued the burnishing process by applying the very fine 3000 grit pad. This last pad is applied dry with only a small amount of water which is sprayed onto the floor and further builds on the polished appearance of the Travertine. This also has the advantage of leaving the floor completely dry and ready for sealing.

Travertine Floor After Polishing in Priorslee Telford Travertine Floor After Polishing in Priorslee Telford

We have several sealers that we recommend for use on Travertine and for this situation I applied two coats of Tile Doctor Colour Grow which is an impregnating sealer that occupies the pores in the stone thus preventing dirt from becoming ingrained there. Colour Grow as its name suggests enhances the colours in the stone and when applied to Travertine it does a good job of enhancing the natural brown colours in the stone. My client was certainly impressed with the improvement and was over the moon with when they saw the result.

Travertine Floor After Polishing in Priorslee Telford


Travertine Floor Professionally Polished in Shropshire

Travertine Tiled Floor Cleaned, Polished and Filled in Priorslee Read More »

Victorian Tiled Hallway Floor Repair Restorations Oswestry

Victorian Tiled Hallway Repaired and Restored in Oswestry

A home owner who lives in the old market town of Oswestry in Shropshire called me in recently to work some Tile Doctor magic on their Victorian Tiled Hallway. They had been refurbishing the house room by room and had left the hallway floor until last. The previous owner of the house had repaired part of the floor at the far end of the hallway with an odd selection of unmatched tiles. The result was a bit of any eyesore and I’m surprised it hadn’t been covered over with carpet which is what most would do, the only good thing about the repair was that it had been laid level.

Victorian Tiled Floor Before Cleaning Oswestry Victorian Tiled Floor Before Cleaning Oswestry

There were several other areas were tiles were loose and would need relaying and a section where holes had been drilled into a couple of tiles damaging them in the process. In total I estimated there was about two square meters of tiles that would need relaying; I would be able to use some of the original tiles that had become loose, but it was clear I would need to track down some replacements either from a reclamation yard or from a retailer if I could find a match.

Victorian Tiled Floor Before Cleaning Oswestry

Repairing a Victorian Tiled Hallway Floor

As it turned out I managed to source the replacements without too much trouble, Victorian Tiles are still very popular today and there are a number of UK companies that still sell them.

My first task was to remove all the loose tiles and carefully remove what I’m going to call the eyesore. I have a handheld power tool that makes light work of removing grout which came in very hand and then once the grout was removed the tiles were prised out. The old grout and adhesive were then scraped off the sub floor, so the replacements could be fitted.

Victorian Tiled Floor During Repair Oswestry Victorian Tiled Floor During Repair Oswestry

With the loose, damaged and eyesore removed it was now a question of cutting replacement tiles to match the existing pattern and then fix them into place with fresh adhesive. This activity took up much of the first day and before leaving the tiles were grouted in, so they would be secure for cleaning the next day.

Deep Cleaning a Victorian Tiled Hallway Floor

Day two was all about deep cleaning the entire floor to remove any old coatings and ingrained dirt in the tiles. I did this using a strong dilution of Remove and Go which was left to soak into the tiles for a while before being scrubbed in using a rotary machine fitted with a black pad; the resultant slurry was then rinsed away with water and extracted off the floor using a wet vacuum.

There were some stubborn paint splashes from decorating that needed dealing with, so I gave these a spot clean using more Remove and Go and plenty of elbow grease. The floor was then given a final rinse to remove any trace of cleaning product and then dried as much as possible with a wet vacuum before being left to dry off fully overnight.

Sealing a Victorian Tiled Hallway Floor

The tiles must be dry before sealing and after testing the floor with a damp meter I confirmed that the floor was indeed dry. I had previously discussed sealers with the owner he had opted for a matt finish. I decided that Tile Doctor Colour Grow would be the best choice of sealer to apply, it’s an impregnating sealer that leaves a matt finish and works by occupying the pores in the tile protecting it from staining from within. It also enhances the natural colours in the tile, only two coats of sealer were needed.

Victorian Tiled Floor After Cleaning Oswestry Victorian Tiled Floor After Cleaning Oswestry

The floor now looks fantastic and most crucially the eyesore has gone.

Victorian Tiled Floor After Cleaning Oswestry
 

Victorian and Victorian Floor Tile restoration in Shropshire

Victorian Tiled Hallway Repaired and Restored in Oswestry Read More »

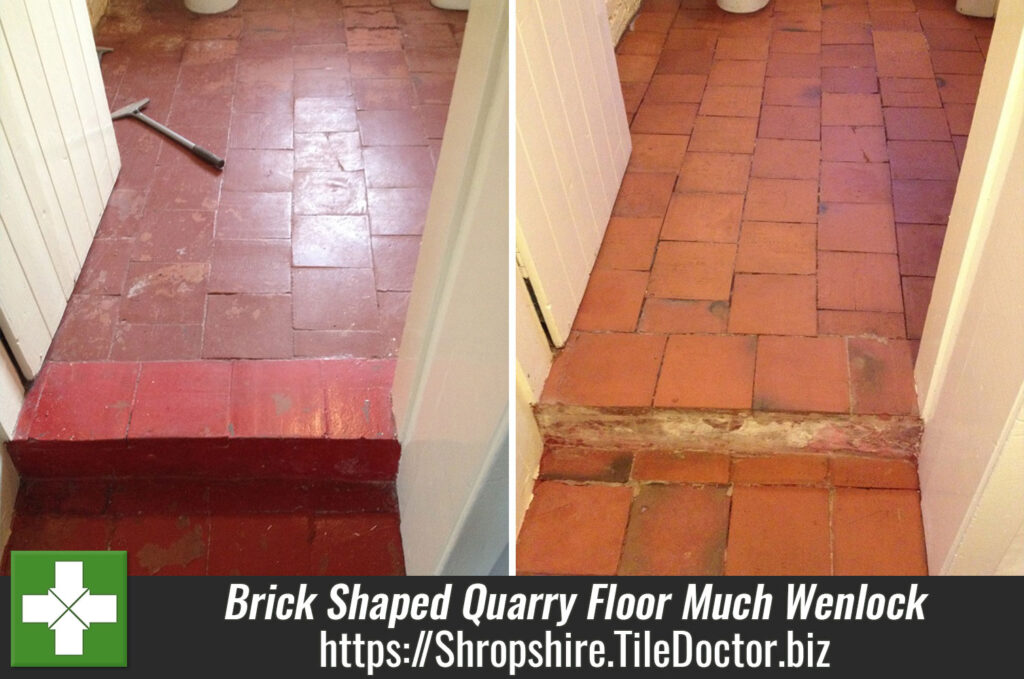
Brick Shaped Quarry Tiled Floor Restored in Much Wenlock

Brick Shaped Quarry Tiled Floor Restored in Much Wenlock

This was a property adjacent to Benthall Hall which is a historic building owned by the National Trust near Much Wenlock. Many of the buildings in this town date back hundreds of years including Benthall Hall which is recorded in the Domesday Book of 1086.

Brick Pattern Quarry Tiled Floor Before Renovation Much Wenlock

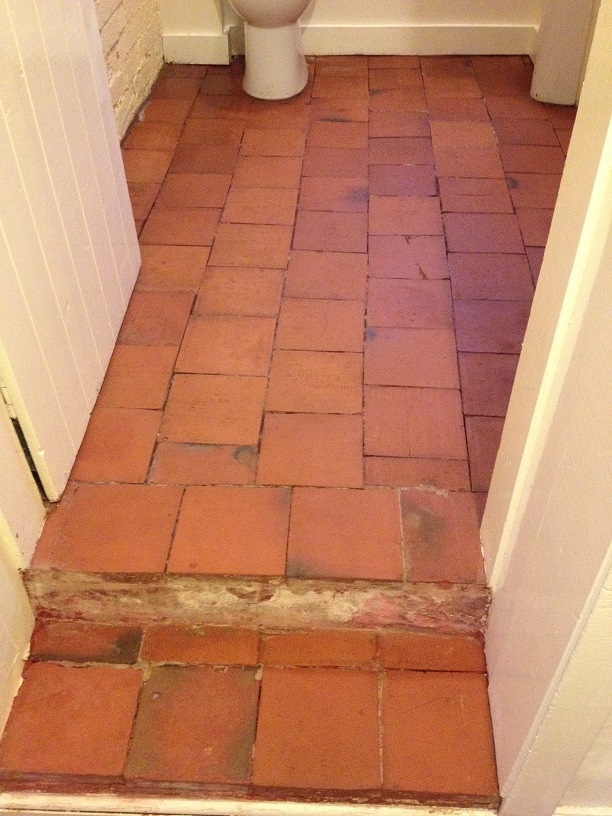
The property hadn’t been lived in for several years and the new tenants wanted to sympathetically improve the look of the Brick Shaped Quarry Tiles on the lounge floor and in the toilet where the floor had been laid with nine-inch square quarry tiles. Both floor areas had been painted over previously and due to dampness issues the paint was flaking off leaving a very unappealing look. No doubt this contributed to the reason the property has been left un-occupied for so long.

Quarry Tiled Floor Before Renovation Much Wenlock

Cleaning a Quarry Tiled Floor

To give the floor a deep clean I would need to remove all the flaking paint; there were several ways I could go about this so after some consideration I decided to try Tile Doctor Remove and Go.

Remove and Go is a multi-purpose coatings remover that can strip sealers off tiles as well as remove paint and other coatings, it’s also designed for use on Tile, Stone and Grout so safe to use. I applied a strong dilution of the product to the floor and left it to soak in for a good ten minutes. It was then scrubbed into the floor using a black seventeen-inch scrubbing pad fitted to a rotary floor machine. The floor was then rinsed down with water and the soil extracted using a wet vacuum. With the floor clean I could see I had been successful in removing most of the paint but there were areas where further work was needed and so I repeated the process three or four times and used a steamer on the stubborn areas until I was happy with the condition of the floor. After rinsing for a final time, I inspected the floor and could see the tiles looked a hundred times better.

My next thought was to seal the Quarry tiles to protect them from future staining and enhance their look. The problem however with old floors like these is that they don’t have a damp proof membrane and can have damp problems. The floor needed to be dry before applying a sealer and with all the water used to rinse the floor it may take some time to dry out. I discussed this issue with the customer and we agreed that I will return to monitor the floor and arrange to seal it when it was dry. In-fact I did return after a week and tested the floor with a damp meter which confirmed the floor still was still too damp.

Sealing a Quarry Floor Sealing

They were due to move into the property in a months’ time, so I visited them again to check the floor and unfortunately the damp level was still too high. I concluded that there were several factors preventing the quarry tiles from drying out: the tiles were laid on sand, the property as I mentioned had not been lived in for years also there had been a lot of rain over the last couple of months.

Brick Pattern Quarry Tiled Floor After Renovation Much Wenlock

We agreed that once they move in and start to heat the building up, the floor have a much better chance for drying and when it looks dry, they will give me a call and I will check it for them and seal it if possible.

Given the damp issues my thoughts are to seal the floor with a coat of Tile Doctor Colour Grow and then finish with Seal and Go Extra, both are which breathable sealers and will leave the floor with a nice sheen finish.

Quarry Tiled Floor After Renovation Much Wenlock


Restoring an Old Quarry Tiled Floor in Shropshire

Brick Shaped Quarry Tiled Floor Restored in Much Wenlock Read More »

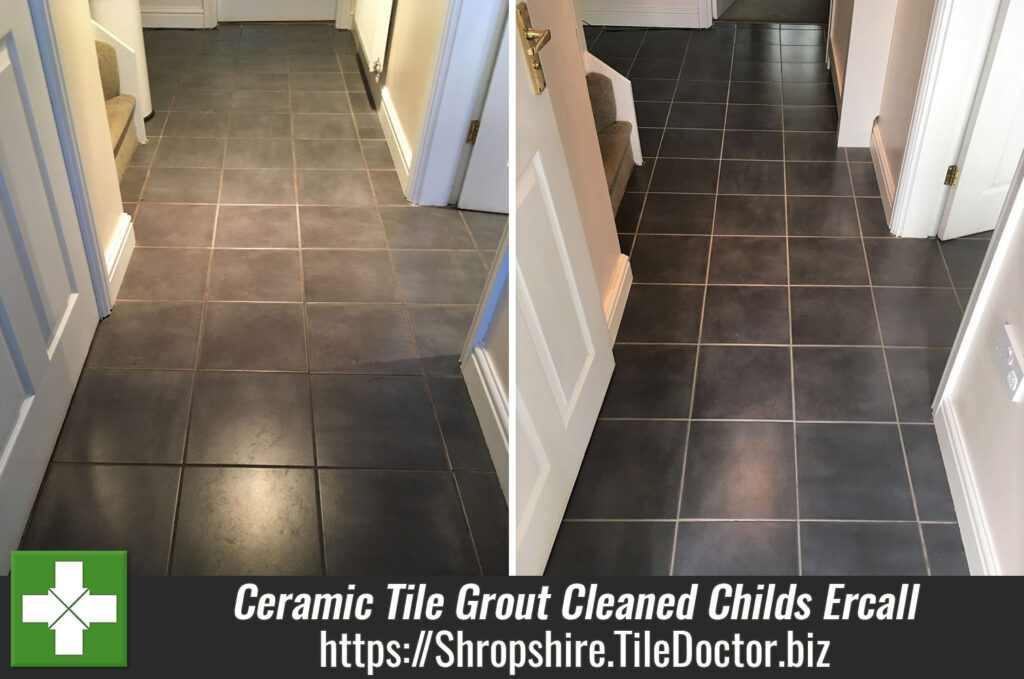
Ceramic Tile Grout Cleaned and Recoloured in Childs Ercall

Ceramic Tile Grout Cleaned and Recoloured in Childs Ercall

Ceramic tiles don’t have the charm of natural stone, but they are very easy to keep clean; grout on the other hand has a porous top layer that can become stained. This was the problem with a customer of mine who lives in the small rural village of Childs Ercall in the North of Shropshire. The customer had moved in about two years ago and they said that they can keep the floor clean and their main problem was the grout.

I went to take a look at the problem and gave the grout in one section a good scrub with Tile Doctor Pro-Clean which is a strong alkaline tile and grout cleaning product. The result was good and although the grout returned to its original colour they wanted it to be changed.

Ceramic Tiled Kitchen Floor Before Grout Cleaning in Childs Ecrall

Cleaning and Preparing the Ceramic Tile and Grout

Before colouring the grout, it made sense to give the Ceramic tile and grout a thorough clean by scrubbing in a weak dilution of Tile Doctor Pro-Clean with a floor buffer fitted with a scrubbing pad running at slow speed. Once done I rinsed the floor with water and extracted the slurry with a wet vacuum.

With any grit and dirt removed from the floor the next step was to prepare the grout for the colourant. Tile Doctor have an acidic pre-treater cleaner for this which cleans and microscopically etches the grout giving the colourant a superior bond with the colourant. The solution is applied to the grout and then scrubbed in with a stiff brush before being rinsed off with water as before.

Applying Grout Colouring

With the tiles clean and the grout prepped I left the floor to dry for an hour before moving onto grout colouring using a colour of their choosing. There are ten colours in the Tile Doctor range and they are easily applied using a small brush wiping off any excess as you go, it was a large area with a lot of grout lines to cover so took the rest of the day to complete

Ceramic Tiled Kitchen Floor After Grout Cleaning in Childs Ecrall
I have to agree with the customer, changing the grout colour was a good move and I think you will agree the floor now looks much improved. The grout colourant has the additional advantage of providing a barrier over the grout which will protect it from further issues and make it as easy to clean as the ceramic tiles.

Ceramic Tile Grout Prepped and Recoloured in Shropshire

Ceramic Tile Grout Cleaned and Recoloured in Childs Ercall Read More »

Mexican Terracotta Tiles Deep Cleaned and Sealed in Shrewsbury

Mexican Terracotta Tiles Deep Cleaned and Sealed in Shrewsbury

Mexico is known to produce some of the best quality Terracotta tiles, with the Saltillo region in the north-east of the country being particularly famous for its craftsman. People from countries all over the world import these tiles and use them in their houses to create fantastic, colourful floors.

This set of Mexican Terracotta floor tiles had been installed throughout the ground floor of a property in historic Shrewsbury which is on the Welsh border and renowned for being the birthplace of Charles Darwin. The tiles were in all the functional areas of including the Large kitchen/diner, pantry, utility room and downstairs WC and so had seen a fair share of wear which had worn off any protective sealers that may have been present.

The floor had not received any maintenance for some time so it was now in dire need of a deep clean and re-seal. At a loss for how to improve the condition of the floor, the property owner contacted me to restore the Mexican Terracotta tiles back to their original condition.

Mexican Terracotta Tiled Floor Before Cleaning Shrewsbury
I visited the property to conduct a test clean and, impressed with the result I achieved, the client booked me in to complete the job.

Mexican Terracotta Tiled Floor Before Cleaning Shrewsbury

Cleaning a Mexican Terracotta Tiled Floor

Before beginning the work, I made sure to cover the bottom of the kitchen units with plastic wrap to protect them from splashes during the cleaning process. I then started to clean the floor using a strong dilution of Tile Doctor Pro-Clean in combination with a scrubbing brush fitted to a rotary machine.

Mexican Terracotta Tiled Floor After Cleaning Shrewsbury
Pro-Clean is a versatile and powerful high alkaline that can be used with reliable results on all tile, stone and grout. Once I applied it liberally across the floor I left it to dwell and seep into the pores of the tile. After scrubbing it was rinsed off using water and the soiled solution was extracted using a wet vacuum. Stubborn stains were re-treated and then I focused my attention on to cleaning the dirty grout lines using more Pro-Clean scrubbed in with a special grout brush.

Mexican Terracotta Tiled Floor After Cleaning Shrewsbury
Once I was happy with the condition of the tile and grout I gave the floor a good rinse with water and used the wet vacuum machine again to remove as much moisture from the floor as possible and then left the floor to dry off fully overnight.

Sealing a Mexican Terracotta Tiled Floor

Upon my return to the property I immediately checked the floor to see if it was dry enough to be sealed (thankfully, it was). Testing for damp issues is incredibly important before sealing because any excess moisture can affect the sealer and negatively affect its performance.

I sealed the floor using two coats of Tile Doctor Colour Grow, an impregnating, colour enhancing sealer which offers the natural looking, matte finish the customer requested to match the rustic feel of the tiles.

Mexican Terracotta Tiled Floor After Sealing Shrewsbury
The customer was really pleased with the improved condition of his floor. So much so, in fact, that he left the following testimonial:

“Five-star performance from Tile Doctor Jozsef Hoffmann in terms of professionalism and customer service. Really pleased with the end result of our kitchen floor – a vast improvement on what is was like. Very happy that we found Tile Doctor and will certainly use them again when needed. I have no problem in recommending to both family & friends.”

Mexican Terracotta Tiled Floor After Sealing Shrewsbury
 

Professional Restoration of a Mexican Terracotta Tiled Floor in Shrewsbury

Mexican Terracotta Tiles Deep Cleaned and Sealed in Shrewsbury Read More »

Quarry and Victorian Tiled Floors Restored in Shrewsbury

Victorian and Quarry Tiled Floors Restored in Shrewsbury

Details below of a red and black Quarry tiled floor at a house belonging to a customer in the Shropshire market town of Shrewsbury, which dates back to medieval times. The owner had recently moved back to the area and purchased the house with the intention of restoring all its original features including the Quarry tiles floor which had several coats of red floor paint and had been covered with carpet for several years, I guess the previous owner wasn’t sure what else to do with it.

Black and Red Quarry Tiled Dining Room Before Cleaning in Shrewsbury
I was also asked to refurbish the Victorian Tiled hallway and porch which was in an equally neglected state.

Victorian Tiled Hallway Before Cleaning in Shrewsbury
Naturally this is exactly the sort of thing we do so I was confident the floor could be significantly improved with our assistance and after popping round to take I look provided a quote although due to other priorities it was a whole year later before I was asked to come and do the job.

Black and Red Quarry Tiled Dining Room Before Cleaning in Shrewsbury

Cleaning a Quarry Tiled Floor

There was cement based building residue, plaster and efflorescence on the floor so I decided to treat the floor with a strong dilution of Tile Doctor Remove and Go which was left to soak into the tiles for a while before being scrubbed in using a rotary machine fitted with a black pad; the resultant slurry was washed away using more water and a wet vacuum.

The whole process was repeated until I was satisfied that any stubborn areas had been dealt with and then the floor given an acid wash with Tile Doctor Grout Clean-up to remove the efflorescence.

Once I was happy with the condition it was given a final rinse to remove any trace of cleaning products and then left to dry for four days.

Sealing a Quarry Floor Sealing

The tiles have to be dry before sealing and after testing the floor with a damp meter I confirmed that four days has been sufficient and the floor was indeed dry. The next step was to apply three coats of Tile Doctor Colour Grow which is an impregnating sealer that occupies the pores in the tile and enhances the natural colour of the tiles in the process.

Black and Red Quarry Tiled Dining Room After Sealing in Shrewsbury
I was able to use the same cleaning and sealing process on both floors and I think you will agree it made quite a difference and both floors have been transformed.

Victorian Tiled Hallway After Cleaning in Shrewsbury
 

Quarry and Victorian Floor Tile restoration in Shropshire

Victorian and Quarry Tiled Floors Restored in Shrewsbury Read More »

Modern Quarry Tiles Uncovered and Restored in Nesscliffe

Modern Quarry Tiles Uncovered and Restored in Nesscliffe

This customer had just bought a house in the small Shropshire village of Nesscliffe. Like many new property owners, she was keen to make some changes to the interior decoration, deciding to pull up the carpet they she didn’t like that covered almost the entire ground floor of the house. Upon doing so she and her partner discovered a large area of original Quarry tiles.

Modern quarry tiled floor in Nesscliffe before cleaning
They decided that instead of replacing the carpet with a new one, they would keep the original floor and attempt to restore its condition. However, their efforts to restore the tiles by themselves proved ineffective – many of the cheaper, supermarket cleaning products were not suited for the job of removing years’ worth of dirt and stains.

Modern quarry tiled floor in Nesscliffe before cleaning
At that point they decided to call me. I visited the property and ran a test clean to see what could be achieved. The customer was more than happy with the initial results and booked me in to undertake the full restoration.

Cleaning Dirty and Stained Quarry Tiles

The most noticeable problem with the tiles was a series of paint splashes and plaster deposits covering almost the entirety of the floor, the result of previous decoration work and the installation of carpet.

I removed these by applying a strong dilution of Tile Doctor Pro Clean and working it into the tiles using a scrubbing brush fitted to a rotary machine, with the alkaline cleaner reliably breaking down the stubborn paint splashes.

I then worked the product into the grout lines too using a grout brush. To tackle the plaster and cement-based residue I used Tile Doctor Grout Clean Up, a phosphoric acid cleaner which removes heavy stains.

Following the cleaning, I left the floor to dry for a week to allow for any excess moisture to evaporate.

Sealing Quarry Tiles

On my return to the property I immediately checked whether the floor was dry enough to be sealed. We always do this as excess moisture can very easily effect the performance of the sealer.

Thankfully the floor was completely dry and I was able to seal the tiles using five coats of Tile Doctor Seal & Go. Seal & Go is a topical sealer, meaning it builds up a layer of protection again dirt and stains on the surface of the stone. We recommend it for tiles such as Quarry, Victorian and Slate. While offering surface protection it also provides a pleasing low-sheen finish.

Modern quarry tiled floor in Nesscliffe after cleaning
The customer was really pleased with the result. Within a week the newly discovered Quarry tiled floor had been transformed from an apparent lost cause to a real asset to the home of the new property owners.

Modern quarry tiled floor in Nesscliffe after cleaning
 

Professional Quarry Tiled Floor Restoration in Shropshire

Modern Quarry Tiles Uncovered and Restored in Nesscliffe Read More »

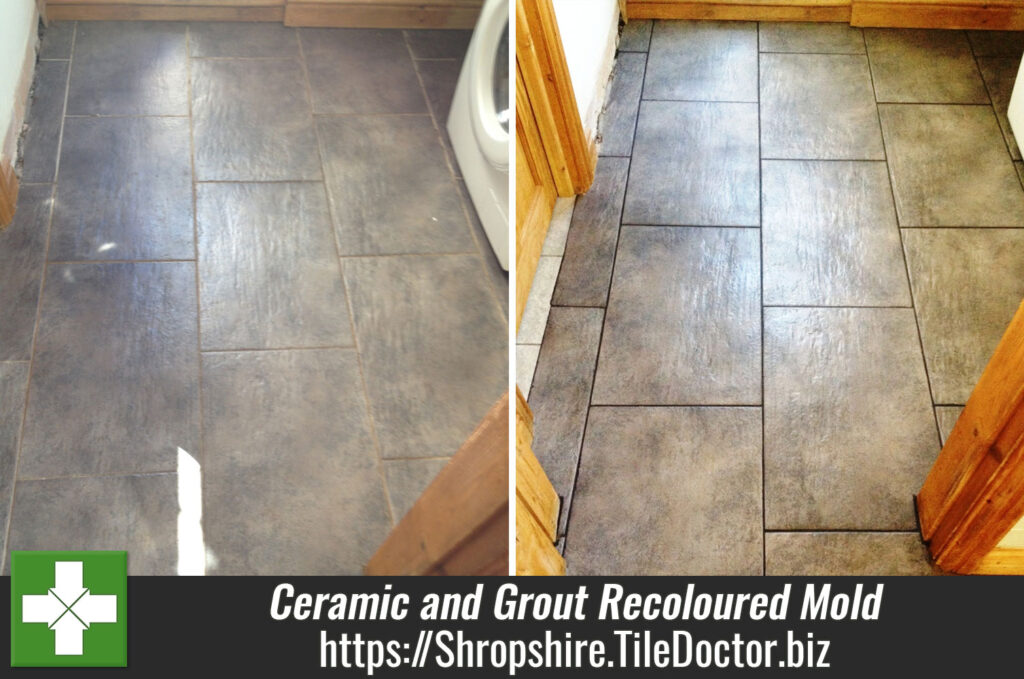
Ceramic Tiled Floor Cleaned and Grout Recoloured in Mold

Ceramic Tiled Floor Cleaned and Grout Recoloured in Mold

Moving into a new home is a stressful but rewarding experience. This customer had just recently moved into a property in the neighbouring and historic Flintshire town of Mold, and was keen to make some renovations.

High on the agenda was the restoration of a large number of Ceramic floor tiles spread throughout multiple downstairs rooms. Although undecided as to whether to keep the tiles for the long-term or have them removed, the customer did resolve to have them professionally cleaned, especially since the previous owner had left the grout in a miserable state.

Ceramic Tiled Floor Before Cleaning in Mould
Upon initial inspection I noticed that the previous owner had attempted to put more grout on top of the existing one in some areas, the problem with this being that the two groups were of different colours. This left the grout looking inconsistent and dirtier than it actually was. I mentioned to the customer that I could re-colour the grout for them after cleaning the floor and that it would be the best solution in this situation.

Ceramic Tiled Floor Before Cleaning in Mould

Cleaning and Colouring Ceramic Tiled Floor Grout

As mentioned, the tiles themselves needed a deep clean, and so I set about applying a strong dilution of Tile Doctor Pro Clean liberally over the floor and leaving it to dwell for a short period. This allows the product, a high alkaline cleaner suitable for use on most natural stone floors, to seep into the pores of the stone to lift out and dissolve ingrained dirt and stains. Once I had allowed it to dwell I scrubbed the product into the tiles using a black pad fitted to a rotary machine.

Of course I also paid special attention to the grout lines, carefully cleaning them using more Pro Clean. With some floors I usually give the floor an acid wash at this with Tile Doctor Grout Clean Up to remove grout smears and mineral salt deposits but this was not necessary on this particular occasion.

Ceramic Tiled Floor After Cleaning in Mould
Once I had cleaned the entire floor I gave it a thorough rinse with water which was then extracted using a wet vacuum before leaving the floor to dry for two hours assisted with an air mover to speed up the process. When happy that the tiles were completely dry and ready to be re-coloured I went ahead and carefully applied a new black Grout Colourant that matched very well with the natural colour of the stone, giving the whole floor a smarter appearance.

Ceramic Tiled Floor After Cleaning in Mould
The customer was really pleased with the result and left some nice feedback on the job as a whole:

“Excellent experience all round, from initial consultation through to colour advice and scheduling work. Cannot speak highly enough of Joe, thoroughly professional and an amazing result. Highly recommended.”

Ceramic Tiled Floor and Grout Reconditioned in Shropshire

Ceramic Tiled Floor Cleaned and Grout Recoloured in Mold Read More »

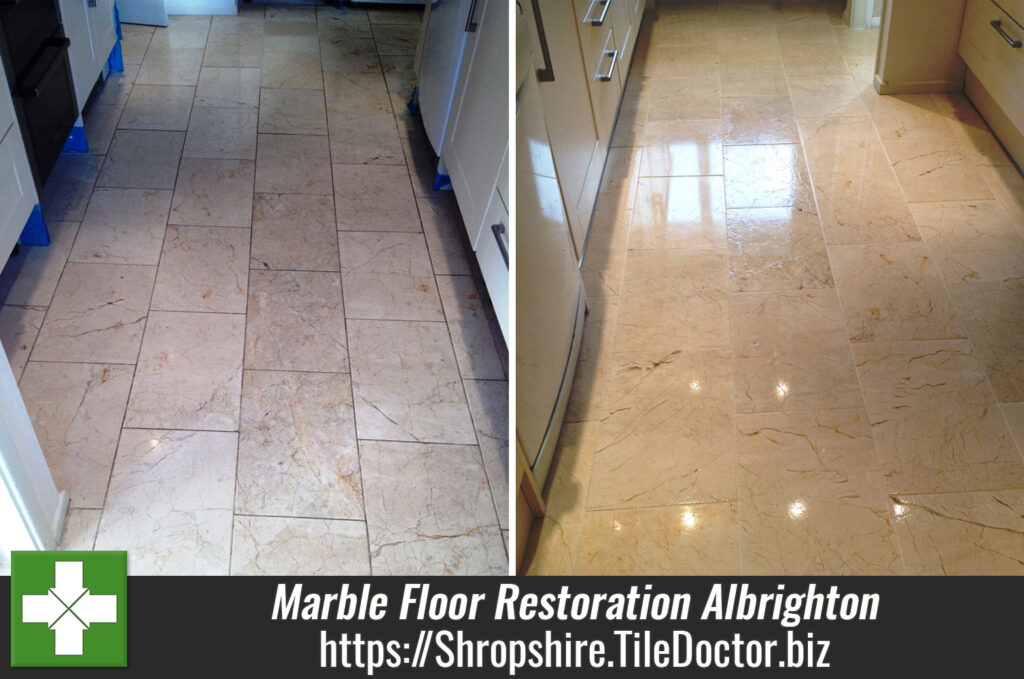
Marble Tiled Floor Restoration in Albrighton

Marble Tiled Floor Restoration in Albrighton

For this job I travelled to the town of Albrighton, which is actually the most easterly settlement in the whole of Shropshire. My client had an issue with their Marble tiled floor which was installed in the kitchen and hallway. They had dropped and broke a bottle of vinegar in the kitchen, and the substance unfortunately came in contact with the tiles. Since Marble is highly sensitive to acid, the vinegar (an acetic acid) had basically etched the surface of the tiles make it impossible clean chemically.

Marble tiled floor before restoration in Albrighton
Although the tiles were a nice, expensive Marble, the person who had first installed them had done a poor job, leaving lippage of up to 5mm in some areas, which would make work trickier. Undeterred I could see it would be possible to restore the floor using a combination of burnishing for the tiles and cleaning with a high alkaline product for the grout lines. I demonstrated this to my client on one tile which went well and I was then given the go ahead to restore the entire floor.

Marble tiled floor before restoration in Albrighton

Cleaning and burnishing acid damaged Marble tiles

My first task focused on cleaning the grout lines using a solution of Tile Doctor Pro-Clean worked in with a stiff grout brush. Pro-Clean is a high alkaline cleaner suitable for use on most types of natural stone floor. It helped to alleviate most of the grout staining caused by the vinegar, whilst also lifting out any ingrained dirt and muck, and this left the grout looking a lot cleaner.

After cleaning the grout lines I was able to move on to burnishing the tiles. As previously mentioned, no chemical product would be able to have an effect on the damaged tiles, so I resolved to burnish them using a system of four diamond encrusted burnishing pads fitted to a rotary machine. Working first with a coarse burnishing pad, and moving through to medium, fine and very fine pads, lubricated with a little water, I was able to significantly reduce the appearance of the acid stains, while also giving the tiles a nice polished finish.

Sealing a Marble tiled floor

Following the cleaning and burnishing processes I gave the tiles a good rinse to remove any remaining residue and then ensured the floor was completely dry before starting on the sealing.

To seal the floor and maximise the appearance I used Tile Doctor Colour Grow and Tile Doctor Shine powder. Colour Grow is an impregnating sealer that seeps into the pores of the stone intensifying and enhancing the natural shades and colours in the stone whilst also providing stain protection;
Shine Powder on the other hand is a crystallising powder that is ground directly into the tiles to provide a high shine finish and durable surface protection.

Marble tiled floor after restoration in Albrighton
My client and her husband were really happy with the results and left the following message on the Tile Doctor Feedback system:

“Jozsef was a charming young man in every respect, who worked very hard and achieved an amazing result. The tiles look better than the day they were laid. We are absolutely delighted with the work he has done and will recommend him to all our acquaintances. Thank you, Jozsef!”

Marble tiled floor after restoration in Albrighton
 

Putting new life into an acid etched Marble tiled kitchen floor in Shropshire

Marble Tiled Floor Restoration in Albrighton Read More »

Cleaning and Sealing Handmade Mexican Terracotta tiles in Wellington

Cleaning and Sealing Handmade Mexican Terracotta tiles in Wellington

This Mexican Terracotta tiled floor was installed throughout the kitchen, dining room, hallway and back porch of a house in the town of Wellington which is the third largest town in Shropshire. It was interesting to work with real handmade Mexican Terracotta tiles which I understand are left outside to dry in the sun, which would seem to be true as in some places you could see the tiles were marked by some animal footprints.

These particular Terracotta tiles were laid over a decade ago and now overdue a deep clean and re-seal, additionally the floor had suffered from a crack in the grout line near the doorway to the kitchen, so I quickly fixed that before making a start on a thorough clean and re-seal for the entire surface.

Cleaning Mexican Terracotta tiles

The previous sealer had worn away so to clean the floor I used a strong dilution of the high alkaline cleaner Tile Doctor Pro Clean. Under normal circumstances I would apply the solution to the tiles using a black scrubbing pad, but in this case I resolved to use a brush fitted to my rotary machine due to the Terracotta floor’s uneven surface. The solution really helped to lift out the dirt and stains, and the residue was extracted using a wet vacuum.

Mexican Terracotta Tile Cleaning Wellington Mexican Terracotta Tile Cleaning Wellington

I then turned my attention to cleaning the grout, using the same Pro-Clean and water combination applied with a stiff grout brush. After giving the floor an initial rinse, I realised that there were a couple stubborn stains still remaining on the tiles. To remove these I used Tile Doctor Remove & Go, a powerful cleaner that is particularly effective at penetrating into porous stone like Terracotta to lift out deeply ingrained muck.

After completing the clean, I gave the floor another thorough rinse, before leaving the house for a week to give the area plenty of time to dry.

Mexican Terracotta Tiles After Cleaning in Wellington Mexican Terracotta Tiles After Cleaning in Wellington

Sealing Mexican Terracotta tiles

Upon my return, my first task was to inspect the floor for dampness. It is always important to do this because any leftover moisture can potentially damage the performance of the sealer. Nonetheless, as expected, the floor was dry enough for the sealer to be applied.

I applied a total of nine coats of Tile Doctor Seal & Go, which provided the floor with a nice sheen finish and durable surface protection for the future. Seal & Go is suitable for use on internal, unsealed porous surfaces such as Terracotta, Sandstone, Slate, and more.

Mexican Terracotta Tiles After Sealing in Wellington Mexican Terracotta Tiles After Sealing in Wellington

My client was extremely pleased with the results, and left the following comment on the Tile Doctor feedback system:

“Joe is a true professional. He was completely committed to doing the best job possible. Also, his manners were impeccable. A pleasure to have in the house.”

Deep Cleaning Terracotta Tiled Floors in Shropshire

Cleaning and Sealing Handmade Mexican Terracotta tiles in Wellington Read More »

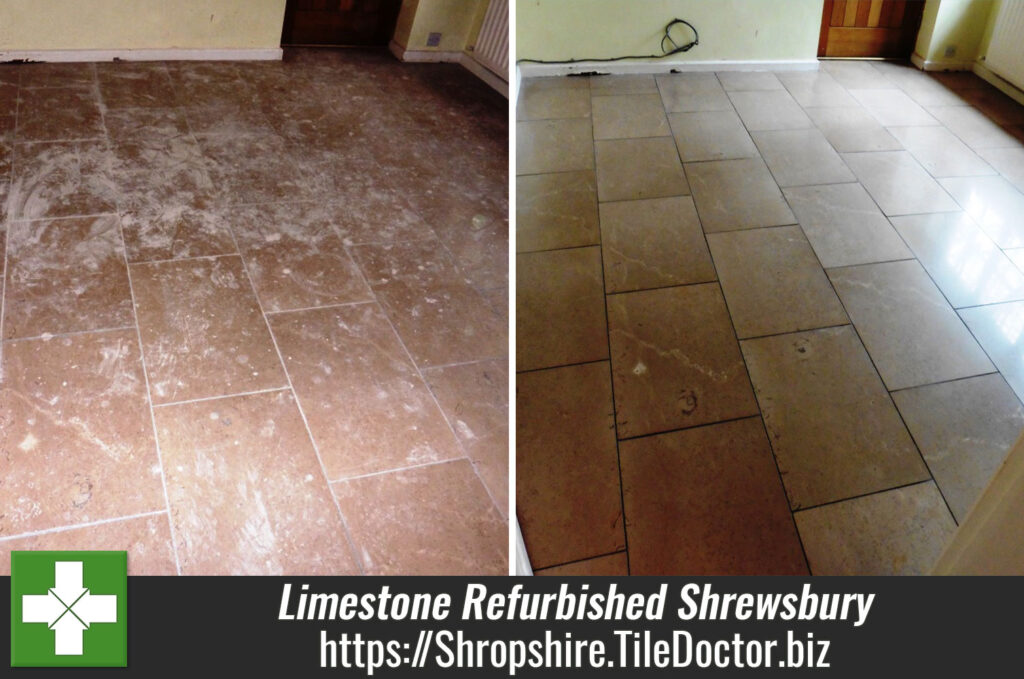
Limestone Kitchen and Utility Refurbished in Shrewsbury

Limestone Kitchen and Utility Refurbished in Shrewsbury

This customer had recently bought a house in Shrewsbury and was in the process of refurbishing it including replacing the kitchen which when I arrived had been removed leaving an area of flooring which was a different shade to the rest. Additionally the floor has been very badly laid resulting in lippage problems between the tiles and in some places there was a 3mm difference in the level between adjacent tiles. To make things worse there had a leak in the bathroom above which caused the ceiling to come down leaving a big mess in the utility room.

Limestone Floor in Shrewsbury Kitchen Before Limestone Floor in Shrewsbury Utility Before

Cleaning Limestone Tiles

The polished Limestone tiles needed to be cut back and refinished with a set of diamond encrusted burnishing pads however my first task was to clean the grout lines by applying a medium dilution of Tile Doctor Pro-Clean and scrubbing it into the Kitchen and Utility grout with a stiff narrow brush. I gave the grout a rinse with hot water and removed the now soiled water with a wet vacuum.

I had spoken to the customer earlier about the lippage problem and recommended that we could resolve it with a set of very coarse milling pads which effectively grind away at the Limestone until the whole floor is completely flat. The customer was not keen on this and after discussing the options I agreed to treat the most problematic edges with a handheld machine and set of six inch burnishing pads which gave a fairly good result.

The burnishing process requires the application of four different grades of diamond pad fitted to my rotary floor machine and lubricated with a little water. You start with the coarse pad which removes the dirt from the Limestone and you move onto the medium, fine and superfine polishing pads until the surface is restored. The process requires the floor to be rinsed between the application of each pad and this needs to be removed using a wet vacuum.

Sealing Limestone Tiles

Once I had finished polishing and the floor was dry I applied a single coat of Tile Doctor Colour Grow which impregnates into the pores of the tile to prevent other contaminates getting in there; Colour Grow also does a great job of bringing out the natural colours in the stone.

Limestone Floor in Shrewsbury Kitchen After Limestone Floor in Shrewsbury Utility After

The customer was very happy with the end result and left the following feedback:

” Jozsef was really excellent, professional and very polite. The limestone tiles in our new home were dreadful, we thought they would have to be removed, but Joe somehow managed to get them clean again. He left everywhere clean and tidy and we would wholeheartedly recommend him. Mr & Mrs Leech, Shrewsbury.”

Limestone Tiled Floor Burnished and Sealed in Shropshire

Limestone Kitchen and Utility Refurbished in Shrewsbury Read More »

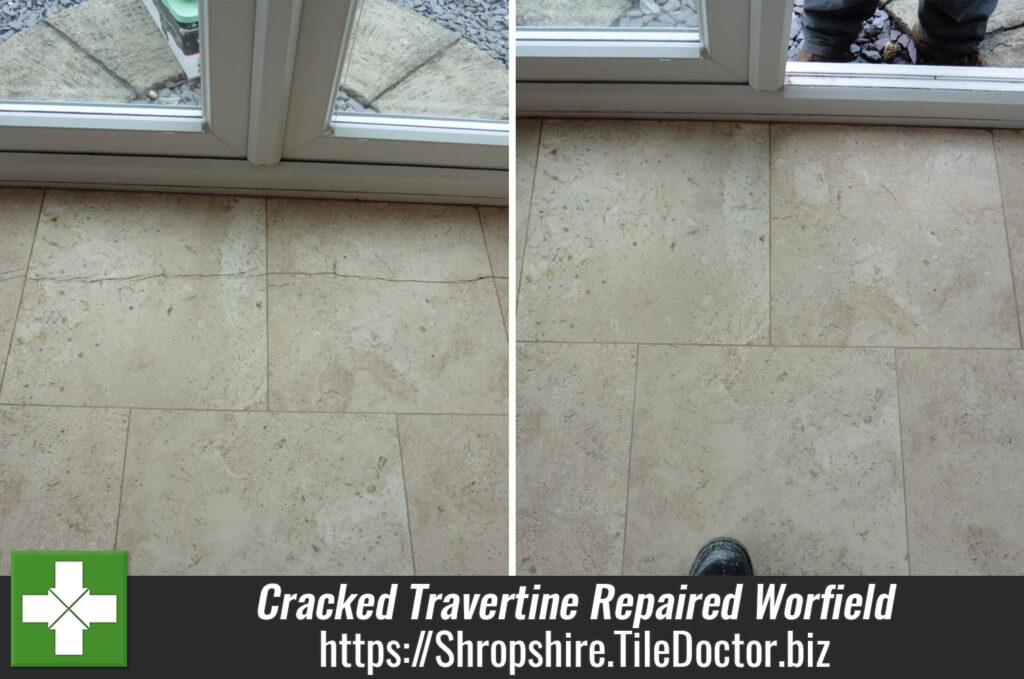
Cracked Travertine Tiles Repaired in Worfield

Cracked Travertine Tiles Repaired in Worfield

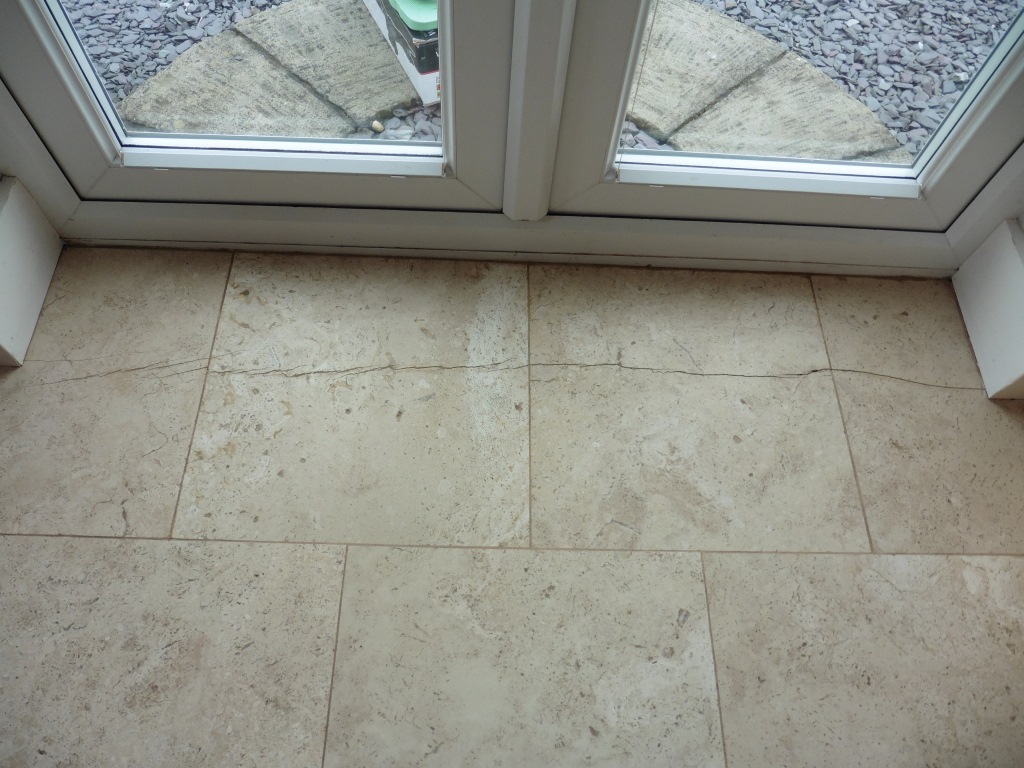
This customer from the village of Worfield has a Travertine tiled floor in their kitchen/dining room which had a crack across four of the tiles. The dining room forms an extension to the original old building and as you can the crack had occurred along the front of the patio doorway. Potentially this could indicate an issue with the foundation as there was a definite difference in the height of the tiles on either side of the crack.

Cracked Travertine Tiles Before Repair in Worfield

Repairing Cracked Travertine Tile

To repair the crack I cleaned the area, dried it and then filled the crack with a colour matching resin. When the resin was set I started to grind the tiles to bring them back to the same level and then finished by polishing.

Cracked Travertine Tiles After Repair in Worfield
Naturally I mentioned our cleaning and sealing service but as it turns out the customer had only recently cleaned and sealed the floor themselves and so I was only needed for the repair which I think you will agree has turned out rather well, certainly the customer was happy as they left the following feedback on my profile.

“Jozsef has done a brilliant job, would certainly recommend him .”

Travertine Tiled Floor Burnished and Sealed in Shropshire

Cracked Travertine Tiles Repaired in Worfield Read More »

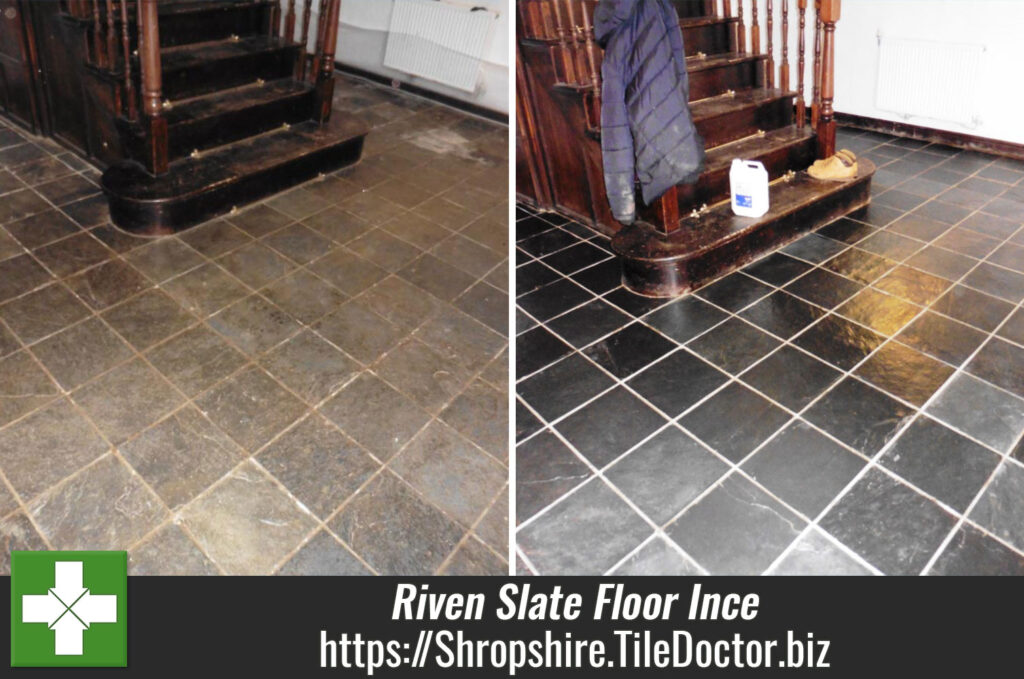
Riven Slate Tiled Floor Restored in old Barn Conversion in Ince

Riven Slate Tiled Floor Restored in old Barn Conversion in Ince

A customer in Telford recently bought this barn conversion in the village of Ince, Cheshire. The building had Riven Slate floor tiles installed on the ground floor from hallway and corridor through to the utility room and downstairs WC. The tiles were not looking their best and in fact the old polyurethane based sealer had gone yellow and started to peel off in places. The building was originally built in 1886 and is grade 2 listed and after an initial attempt to bring the floor back to life didn’t work out as planned the owner decided to get in touch.

Riven Slate Tiled Floor Ince Before Cleaning Riven Slate Tiled Floor Ince Before Cleaning

Cleaning a Riven Slate Tiled Floor

To get the floor back to its original state so it could be re-sealed the old sealer would have to be completely removed from the tiles, fortunately we have a product available that does exactly that called Tile Doctor Remove and Go. Working in sections the tiles were covered with a dilution of Remove and Go which was left to soak into the slate for twenty minutes before being scrubbed in used a rotary machine fitted with a stiff brush head. The resultant soiled solution was then removed from the floor using a wet vacuum and the process repeated until all the old sealer had been removed and the floor was looking clean again. Additionally it was necessary to steam clean the whole floor and scrub stubborn areas with a hand brush. After the whole floor was clean I gave it a thorough wash down with fresh water to remove any trace of cleaning product and then used the wet vacuum to get as much water off the floor as possible and reduce drying time.

Riven Slate Tiled Floor Ince During Cleaning

Sealing Riven Slate Floor Tiles

I left the floor to dry off for a couple of days and then returned to apply the sealer checking the moisture level of the floor first to ensure it was dry enough to take a sealer. I had discussed the various options for sealing and the customer wanted a satin finish so it was decided to use Tile Doctor Seal and Go which is a water based sealer that provides the require finish and being water based can be applied without leaving a solvent smell as it dries, four coats of Seal and Go were needed to fully seal the slate.

Riven Slate Tiled Floor Ince After Cleaning Riven Slate Tiled Floor Ince After Cleaning

It was quite a large area and originally I had estimated it would take two days to remove the old sealer and get the tiles clean in the end however it took three days due to clean the floor due to the state of the tiles and a day to seal. The customer and his wife were really happy with the result and left the following feedback for me on the Tile Doctor feedback system.

I would like to commend Jozsef on his hard work and tile doctor on their faith and training in there staff to achieve such a high standard in an end result. The experience from start to finish has been a very pleasant one. Jozsef was very professional, polite and punctual, knowledgeable, very hardworking and trustworthy. Both my wife and I would not hesitate to recommend Tile Doctor & Jozsef.
Many Thanks again Mr & Mrs Pasquali

Restoring old slate tiles in Ince

Riven Slate Tiled Floor Restored in old Barn Conversion in Ince Read More »

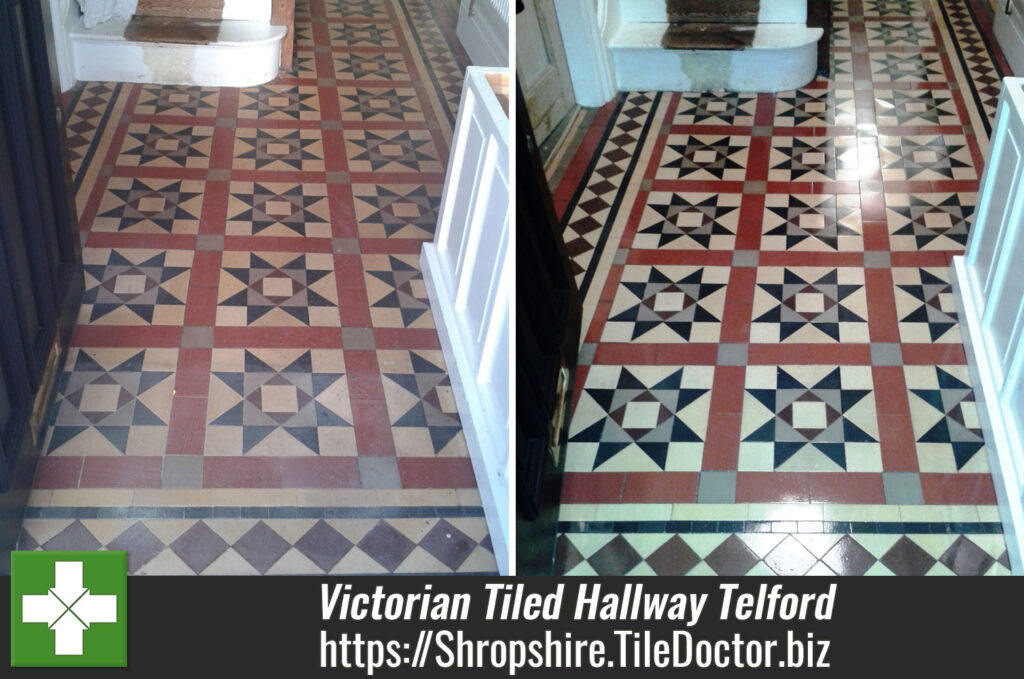
Victorian Tiled Hallway Renovated in Telford

Victorian Tiled Hallway Renovated in Telford

Details below of a customer in Telford who bought a house with a Victorian Tiled Hallway a couple of years prior and has been refurbishing it in sections. When I went there to do the quotation the floor I could see it was in a desperate state and in need of a deep clean and replacement of several broken and cracked tiles, there were several loose ones too.

Victorian tiled Hallway before restoration in Telford Victorian tiled Hallway before restoration in Telford

Cleaning and Repairing a Victorian Tiled Floor

The floor was cleaned using a medium dilution of Tile Doctor Pro-Clean which was left to soak into the tiles for around 15 minutes before being worked into the tile and grout using a rotary machine fitted with a black scrubbing pad and a stiff grout brush. Pro-Clean is a strong alkaline cleaning product that is safe to use on Stone, Tile and Grout. The floor was given a thorough rinse with clean water and a wet vacuum was used to remove the water from the floor, stubborn areas were then spot cleaned using the same process and the floor was then left to dry off overnight.

Victorian tiled Hallway after repair and cleaning in Telford Victorian tiled Hallway after repair and cleaning in Telford

The next day I returned to do the repair work, originally there were seven tiles to replace, but I ended up replacing sixteen tiles and fixing twenty five, fortunately Victorian tiles are still popular and you can still source replacements.

Victorian tiled Hallway after repair and cleaning in Telford Victorian tiled Hallway after repair and cleaning in Telford

Sealing Victorian Tiled Floor

To ensure the repaired areas had sufficient tile for the adhesive and grout to set I left the floor for four days before returning to apply a sealer checking the moisture level first to ensure it was dry enough to take the sealer. To seal the tiles which will help protect them from staining I applied five coats of Tile Doctor Seal and Go which works really well on Victorian tiles and adds a nice subtle shine to the floor also being water based you don’t get that smell that a solvent based sealer has.

Victorian tiled Hallway after restoration in Telford Victorian tiled Hallway after restoration in Telford


Restoring Victorian tiles in Shropshire

Victorian Tiled Hallway Renovated in Telford Read More »

Limestone Tiled Floor Cleaned and Polished in Owestry

Limestone Tiled Floor Cleaned and Polished in Owestry

These Limestone tiles, installed in a lovely residence in the ancient market town of Oswestry close to the English/Welsh border, had become dull and dirty over the years and I was asked to get them looking their best again. When I arrived to do the quotation the customer’s main concern was that the grout lines had become dirty, but when I completed a test clean on one tile and the grout around it they realised the tiles themselves were dirty and had lost their shine to become a mat finish.

Limestone Floor Before Cleaning and Polishing Oswestry Limestone Floor Before Cleaning and Polishing Oswestry

Cleaning Limestone Tiles

It was a large floor so working in sections I gave the floor a general clean using a mild dilution of Tile Doctor Pro-Clean which was spread over the floor with particular attention paid to getting the solution into the grout lines. The solution was left to soak in and eat through any dirt and a stiff grout brush was run along each grout line giving it a good scrub along the way. Next we removed any trace of product by using a wet vacuum to extract the now dirty cleaning solution and rinsed thoroughly with clean water.

There were a couple of holes in the Limestone that needed attention so these were filled with a matching colour. The next step was to use a set of diamond encrusted burnishing pads which attach to a rotary machine and burnish the floor with four different grits from coarse to super fine. To remove any remaining sealer and dirt the floor is burnished using a course pad and a little water to help lubricate passing over each tile around four times in the process. The resultant soiled water is rinsed away with clean water which in turn is removed using a wet vacuum. This process is then repeated with the remaining pads, rinsing between each pad until a nice polish is built up on the tile. I managed to finish with the 2nd and 3rd pads but it was getting late to completely finish the polishing so called it a day.

Sealing Limestone Tiles

When I arrived on the second day to finish the polishing process with the fourth super fine polishing pad and seal the floor the customer thought I had already finished polishing and was already happy with the shine we had achieved so far, so you can imagine how happy she when I told her there was more to do. Once I had finished polishing I applied a single coat of Tile Doctor Colour Grow which impregnates the pores in the stone to prevent other contaminates getting in there; Colour Grow also does a great job of bringing out the natural colours in the stone.

Limestone Floor After Cleaning and Polishing Oswestry Limestone Floor After Cleaning and Polishing Oswestry

The customer was very happy with the end result and

Limestone Tiled Floor Cleaned and Polished in Owestry Read More »

Terracotta Kitchen Floor and Victorian Tiled Hallway in Shrewsbury

Victorian Tiled Hallway and Terracotta Kitchen Floor in Shrewsbury

For this old terraced house in Shrewsbury I was asked to clean and seal two areas which included a Victorian tiled hallway and Terracotta tiled kitchen; I’ve copied below the original request so you can better understand that there was a fair amount of work that needed doing.

“I have 2 areas of quarry tiles that need a serious make over, in the hall and the back room. There are patches of red paint and areas of mineral deposit and lots of ingrained filth!””

As it turned out the customer had only recently bought the property and told me that the previous owner had rented the property out and that the last tenants kept snakes, rats and all sorts of animals there and the remaining smell was one of the concerns of the customer.

After inspecting the Victorian tiled hallway I suspected it had probably been re-laid at some point in the past as the grout line were different in places and there were several new replacement tiles visible. The terracotta floor was more recent and had showed no signs of a sealer being applied which would explain how they had become so dirty.

Victorian Tiled Floor Before Cleaning in Shrewsbury Terracotta Tiled Floor Before Cleaning in Shrewsbury

Cleaning a Victorian and Terracotta Tiled Floors

To clean both floors I applied a dilution of Tile Doctor Remove and Go leaving it to soak in before scrubbing it in using a rotary machine fitted with a black scrubbing pad. I was banking on the Remove and Go to deal with any remaining sealer and also to loosen the paint spots. The resultant slurry was washed away using more water and a wet vacuum and the process repeated until I was happy with the condition of the tiles. I also had to use a steamer on the hallway tiles as the dirt was ingrained in the mainly light coloured tiles and it needed the steam to lift it out. it was then given a final rinse to remove any cleaning products and then left to dry.

Sealing Terracotta and Victorian Floors

I left both floors to dry out overnight and returned to seal them the next day checking first with a damp meter that they were dry. To seal the Terracotta tiles in the kitchen two coats of Tile Doctor Colour Grow was applied, Colour Grow is an impregnating sealer that enhanced the colours and leaves a matt finish which is what the customer wanted. For the hallway however the customer wanted a shine so five coats of Tile Doctor Seal and Go were applied. The one advantage of having two floors to seal was that I could be adding a coat of seal on one floor whilst the other was drying.

Victorian Tiled Floor After Cleaning in Shrewsbury
Apologies for not taking a final photograph of the Terracotta tiles after they were sealed, however the customer was really happy with the job and left a nice testimonial:

“Jozsef was a pleasure to deal with – professional, hardworking and friendly. He was quick to contact me, give me the quote and to schedule the work. He clearly explained what my options were and I am really happy with the work done – both tiled floors look great!”

Cleaning and Sealing Tiled Floors in Shropshire

Victorian Tiled Hallway and Terracotta Kitchen Floor in Shrewsbury Read More »

Travertine Tiled Floor Refurbished in Telford

Travertine Tiled Floor Refurbished in Telford

This property in Telford had been purchased six months earlier with a view to refurbishing it and had recently started to get it back in shape. The history of the Travertine tiled floor was unknown but there was evidence of the wrong kind of maintenance as the legs of the kitchen cabinet was blown by excess moisture. The new owner did mention that the previous owner had three teenage children and I suspect keeping the floor maintained properly was probably not a priority.

Travertine Tile Cleaning Telford Before Travertine Tile Cleaning Telford Before

Cleaning Travertine Tiles

The first step was to give the floor a general wash to remove any grit and the grout clean so we started by applying a mild dilution of Tile Doctor Pro-Clean which was spread over the floor with particular attention paid to getting the solution into the grout lines. The solution was left to dwell for 10 minutes in order for it to soak in and eat through any dirt and existing sealer; we then used a stiff grout brush to scrub each and every grout line. Next we removed any trace of product by using a wet vacuum and rinsing thoroughly with clean water.

The next step was to use our diamond encrusted burnishing pads which attach to a rotary machine and burnish the floor with four different grits from coarse to super fine. First using course pad number 1 we put some clean water on the floor and using our rotary machine slowly burnished the area making sure that we passed over each tile 4 times, this coarse pad cuts into the surface grime of the floor and also removes sealers. The resultant soiled water is rinsed away with clean water which in turn is removed using a wet vacuum. This process is then repeated with the remaining pads, rinsing between each pad until a nice polish is built up on the tile. The floor is then given a final rinse and once we were satisfied that all the slurry had been removed we left the floor to dry overnight.

Cleaning Travertine and Limestone Tiles

When I returned the floor was tested using a damp meter to make sure the Travertine had dried sufficiently for sealing. It had so I started to seal it using a single coat of Tile Doctor Colour Grow which is an impregnating sealer that will occupy the pores in the stone to prevent other contaminates getting in there, Colour Grow also brings out the colours in the stone.

Travertine Tile Cleaning Telford After Travertine Tile Cleaning Telford After

It’s tricky to capture all of this with photographs although you should be able to see the shine now the polish has been restored, the main thing is the customer was very happy with the results and was kind enough to leave the following message.

“We moved into a house with very unloved travertine tiles in the kitchen, bathroom and WC. We were really impressed with Jozsef. He was friendly, knowledgeable and conscientious. He was up front with us about what could be achieved with the tiles and we are very pleased with the results. He worked efficiently, was tidy, prompt and mindful of our very young children. We would definitely recommend Jozsef.”

Travertine Tiled Floor Burnished and Sealed in Shropshire

Travertine Tiled Floor Refurbished in Telford Read More »
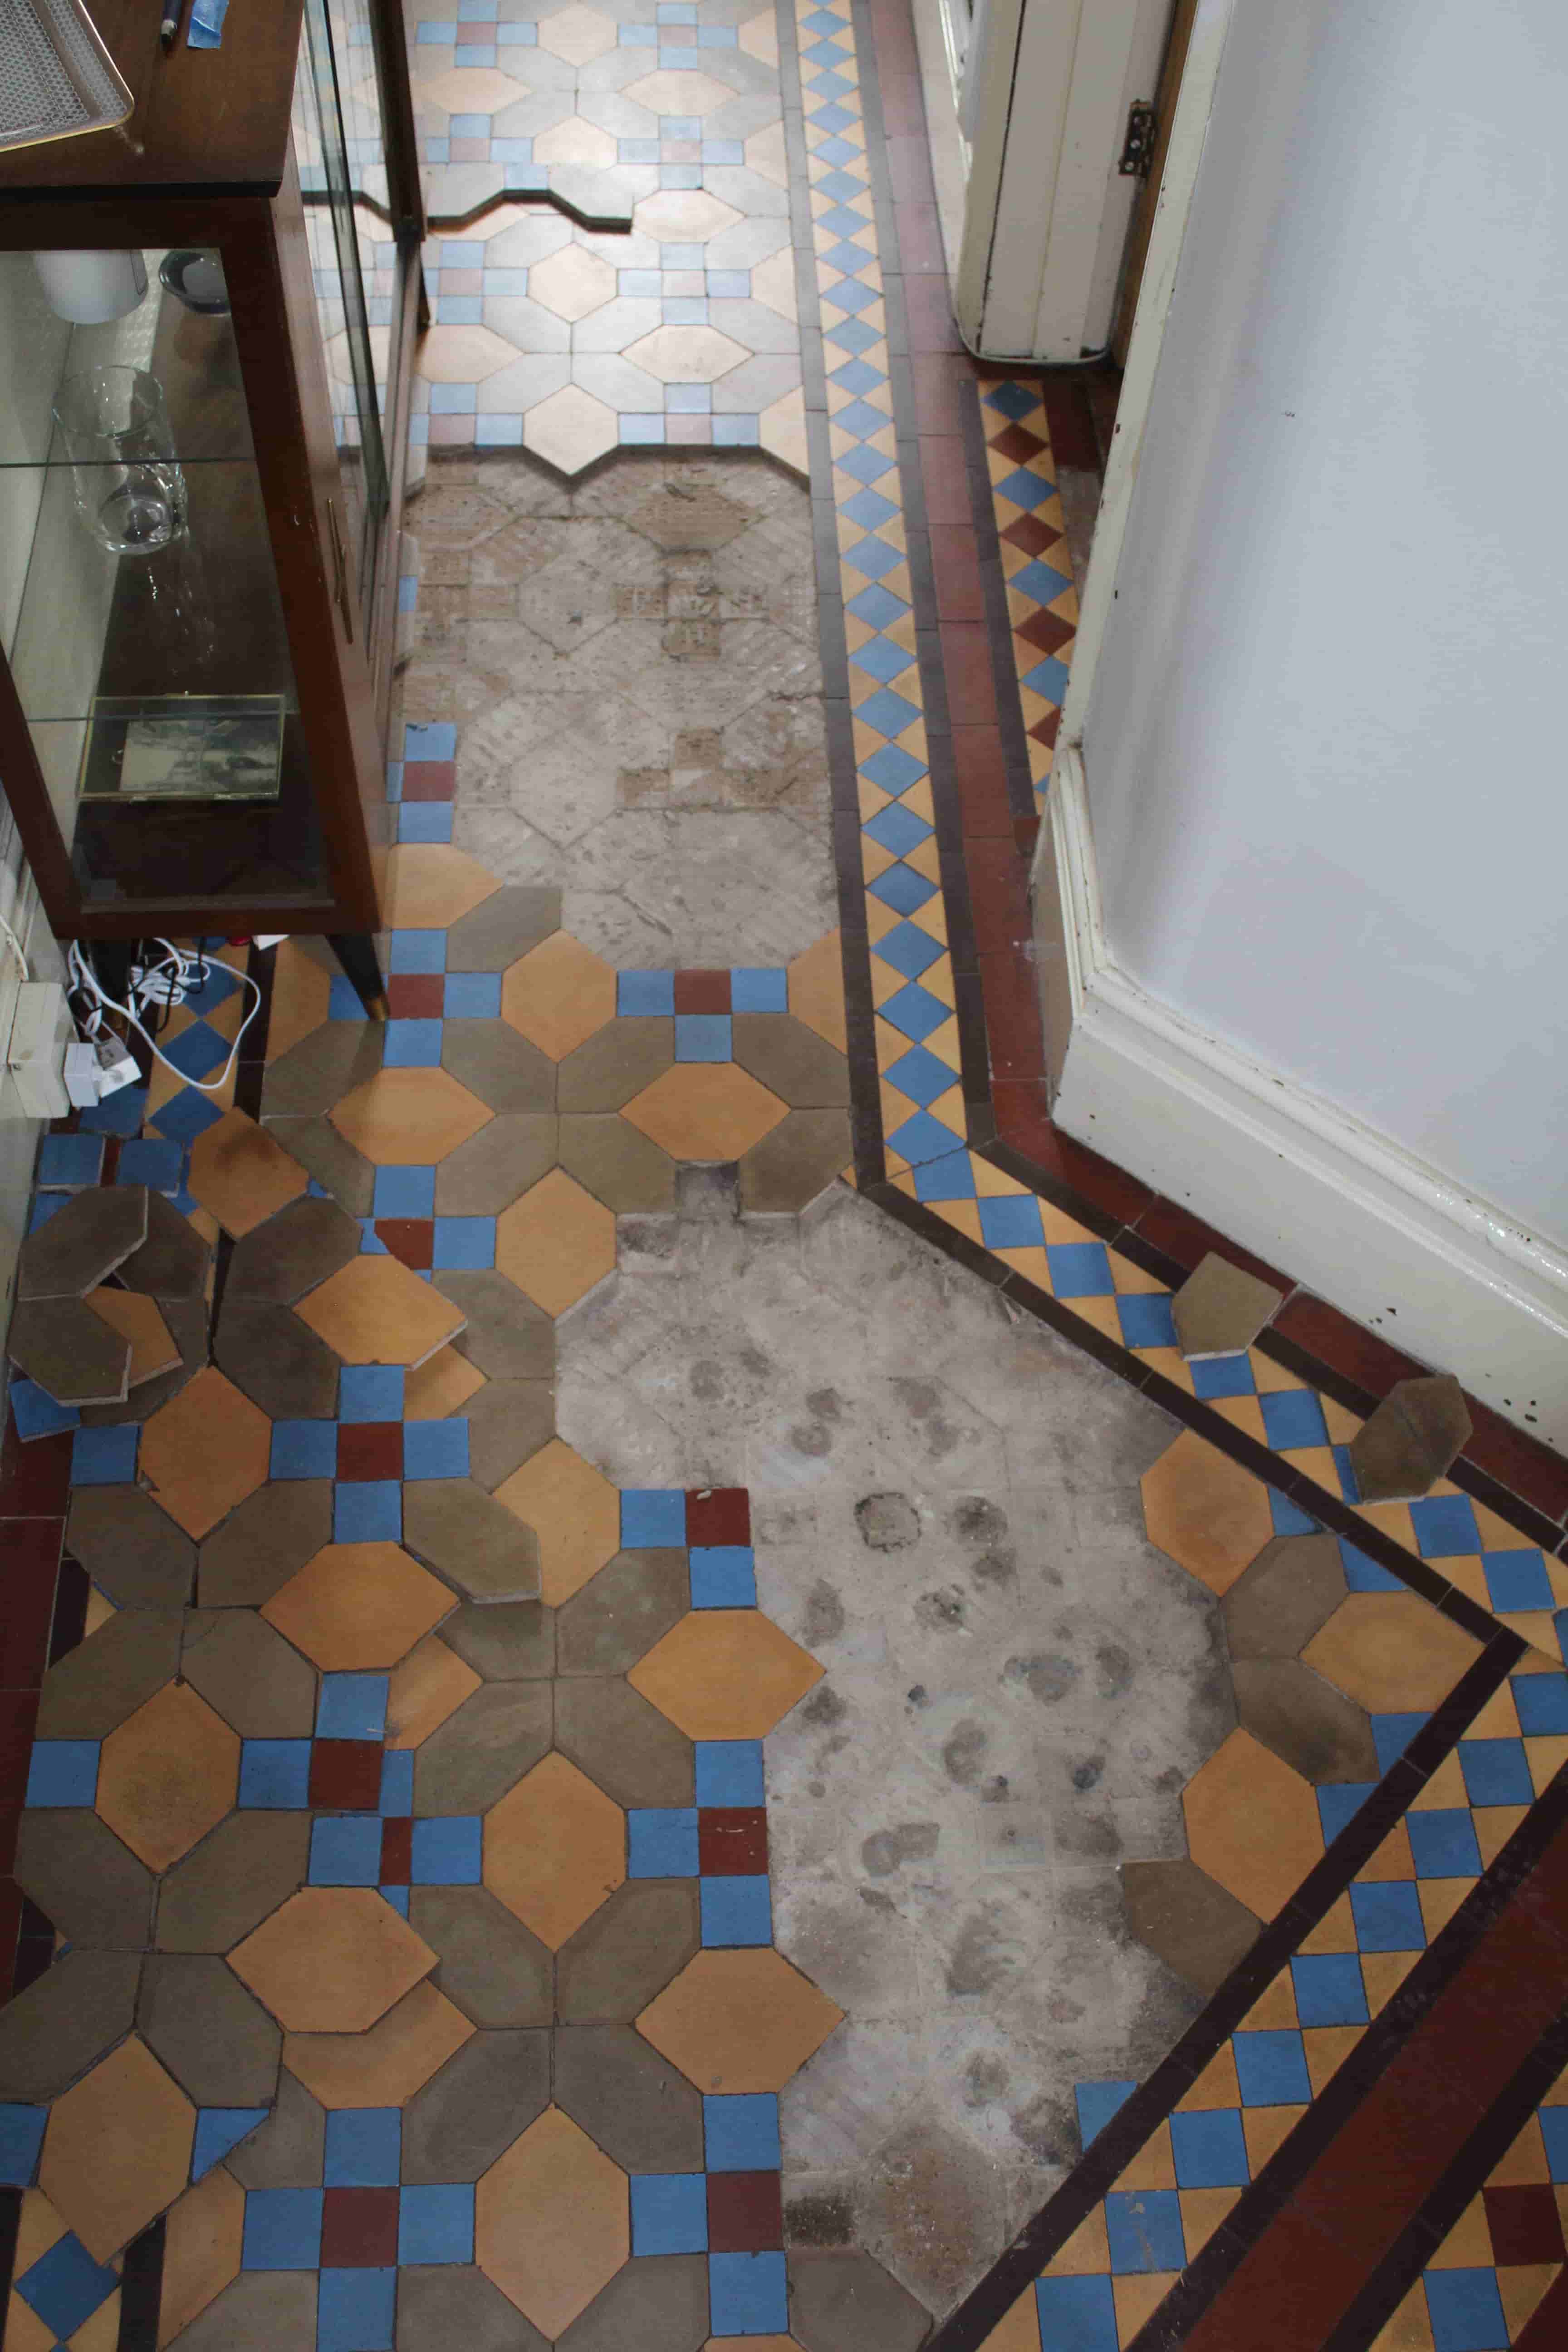
Victorian Hallway Tiles Restored in Whitchurch

Victorian Hallway Tiles Restored in Whitchurch

I’m beginning to wonder if Tile Doctor has started a trend that has got people looking under their hallway carpets looking for period floors. Indeed this customer in Whitchurch has done exactly that and discovered a beautiful Victorian tiled floor which was with the exception of adhesive residue and dirt was in reasonable condition. They had tried to restore it themselves but could not achieve the desired results so being their local Tile Doctor we got the call.

Victorian tiled hallway Whitchurch before cleaning Victorian tiled hallway Whitchurch before cleaning

Removing Glue and Dirt from a Victorian Tiled Floor

The floor was dirty which I would normally take care of with Tile Doctor Pro-Clean however glue requires something stronger so a strong dilution of Tile Doctor Remove and Go was applied, left to soak in and then scrubbed into the tiles using a rotary machine fitted with a black scrubbing pad. Remove and Go does pretty much what its name suggests and is a great product for safely removing coatings from tile. The floor was given a thorough rinse with clean water and a wet vacuum was used to remove the water from the floor and get it dry so it could be sealed. Some stubborn areas were still evident so they were spot treated using more Remove and Go.

Victorian tiled hallway Whitchurch after

Sealing a Quarry Floor Sealing

The floor needs to be thoroughly dry before it can be sealed and this can be a problem with old houses which may have damp issues. I therefore left the floor to dry for 5 days before coming back to seal it and when I returned checked the floor using a damp meter first. The readings were fine however there were a couple of areas that needed further treatment so those were spot treated and then dried until I was satisfied the floor was as good as it could be. I then processed to seal the floor using five coats of Tile Doctor Seal and Go which adds a nice subtle sheen to the tiles as well as providing stain protection going forward.

I think you will agree from the photographs the floor looks great, certainly the customer was really pleased with the result.

Victorian tiled hallway Whitchurch after sealing
 

Restoring Victorian tiles in Shropshire

Victorian Hallway Tiles Restored in Whitchurch Read More »

Deep Cleaning an Indian Sandstone floor at a cottage in Cleestanton

Deep Cleaning an Indian Sandstone floor at a cottage in Cleestanton

This customer had bought a cottage in Cleestanton (Ludlow) six months prior which has a beautiful Indian Sandstone flagstone floor installed across the ground floor. The Sandstone slabs were however in an unfortunate state and had not been deep cleaned for some time, in fact it was very easy to see where the most foot traffic had been due to visible dark lanes in the stone.

Indian Sandstone in Cleestanton Before Cleaning Indian Sandstone in Cleestanton Before Cleaning

Cleaning Riven Sandstone Tiles

I cleaned the floor with a dilution of Tile Doctor Remove and Go which was left to soak into the Sandstone before being worked in with a rotary machine fitted with a scrubbing brush attachment. I used a brush as opposed to a pad as the floor had a riven texture and a flat pad may not have had the desired effect. Tile Doctor is an effective coatings remover ideal for removing sealers for tile, it’s also a good cleaning product having said that there were areas where the old sealer was really stubborn so and I had to retreat those and use steam in the really difficult areas.

Indian Sandstone in Cleestanton During Cleaning Indian Sandstone in Cleestanton During Cleaning

Once the floor was stripped back I gave it a thorough rinse with water using a wet vacuum to remove the liquids from the floor and get it as dry as possible.

Indian Sandstone in Cleestanton After Cleaning

Sealing Riven Sandstone Tiles

I left the floor to dry out thoroughly for four days and then returned to seal it first checking with a damp meter that it was dry. All was as expected so proceeded to seal the stone using four coats of Tile Doctor Seal and Go which is a water based sealer (no smell) and ideal for these types of floor as it offers good protection whilst adding a nice sheen to the surface.

Indian Sandstone in Cleestanton After Sealing Indian Sandstone in Cleestanton After Sealing

The customer was really pleased with the result and can now see all the amazing detail and character in this natural stone floor including evidence of fossilised plants.

Indian Sandstone in Cleestanton Showing Fossils Indian Sandstone in Cleestanton Showing Fossils


Riven Sandstone Tiled Floor Cleaned and Sealed in Shropshire

Deep Cleaning an Indian Sandstone floor at a cottage in Cleestanton Read More »

Quarry and Terracotta Tiled Floors Restored in Alveley

Quarry and Terracotta Tiled Floors Restored in Alveley

These photographs were taken at a recently purchased cottage in Alveley, Bridgenorth and the new owner was keen to refurbish the floors. The quarry tiles in the lounge had grout haze and general dirt on also the grout needed replacing in several places.
The remaining areas were covered with Terracotta tiles which they had thought were quarry tiles. On first impression I thought they were a patterned ceramic tile as the tiles a slight sheen on them and the “pattern” looked uniform however on closer inspection I realised that they were definitely not ceramic so I did a test clean on a small area and it turned out that the apparent pattern was in actual fact from a build up dirt all over the tile; the owners were shocked at the discovery.

Terracotta Tiled Floor Cleaning Alveley TestPatch

Cleaning Quarry and Terracotta Tiles

I cleaned both floors with a dilution of Tile Doctor Remove and Go which was left to soak into the tiles for a while before being scrubbed in using a rotary machine fitted with a black pad and the dirty water was removed using a wet vacuum.

Quarry Tiled Floor Cleaning Alveley Before Terracotta Tiled Floor Cleaning Alveley Before

The Terracotta tiles needed extra attention so I scrubbed them once again with a brush paying special attention to the tiny holes in the surface of the tile which had become ingrained with dirt. Once I was happy both floors were given a final rinse to remove any cleaning products and I finished the day repairing the grout line in the lounge.

Terracotta Tiled Floor Cleaning Alveley During Terracotta Tiled Floor Cleaning Alveley During

Sealing a Quarry Floor Sealing

I left the floor for a week so it could dry out thoroughly and when I returned to seal the floor, the damp meter indicated that the floor was dry enough to take the sealer. At the same time I did a final inspection of the floors and spot cleaned those areas where it was needed using a heat gun to dry the tiles afterwards. The customer had dogs and had specified a matt finish so I sealed the Quarry and Terracotta tiles several coats of Tile Doctor Colour Grow which is an impregnating sealer that occupies the pores in the tile and also enhances the colour of the tile.

Quarry Tiled Floor Cleaning Alveley During Terracotta Tiled Floor Cleaning Alveley After

Needless to say the customer was really pleased with the result.

Deep Cleaning Quarry and Terracotta tiles in Shropshire

Quarry and Terracotta Tiled Floors Restored in Alveley Read More »

Red and Black Victorian Quarry Tiled Floor Restored in Oswestry

Red and Black Victorian Quarry Tiled Floor Restored in Oswestry

Details below of a Victorian Quarry tiled floor belonging to a customer in Oswestry who had recently moved back to the area and wanted to restore the original features of the house including the Quarry tiles floor which had several coats of red floor paint and was later was covered with carpet for a number of years. The customer described the floor as:

“I have 2 areas of quarry tiles that need a serious make over, in the hall and the back room. There are patches of red paint and areas of mineral deposit and lots of ingrained filth!””

Red Black Quarry Tiles Oswestry Before Red Black Quarry Tiles Oswestry Before

Cleaning a Quarry Tiled Floor

I managed to clean the floor with a strong dilution of Tile Doctor Remove and Go which was left to soak into the tiles for a while before being scrubbed in using a rotary machine fitted with a black pad; the resultant slurry was washed away using more water and a wet vacuum. The whole process was repeated several times as the paint was really stubborn and in places I had to remove the paint removal with a scraper. Once I was happy with the condition it was given a final rinse to remove any cleaning products and then left to dry for five days leaving an air mover with the customer to accelerate drying.

Red Black Quarry Tiles Oswestry After Cleaning Red Black Quarry Tiles Oswestry After Cleaning

Sealing a Quarry Floor Sealing

The tiles have to be dry before sealing and even though I returned five days later the damp meter still indicated that there was moisture in the tiles which I suspect was due to there being no membrane in place under the old Victorian tiles. I agreed with the customer to come back a further week later which proved sufficient and the floor was dry enough to take the sealer.

The customer wanted a matt finish so I sealed the floor with two coats of Tile Doctor Colour Grow which is an impregnating sealer that occupies the pores in the tile and also enhances the colour of the tile.

Red Black Quarry Tiles Oswestry After Sealing Red Black Quarry Tiles Oswestry After Sealing

The customer was out when I applied the sealer but when the she got home she sent me the following message:

“The floor looks brilliant. So much better than I had ever hoped. Thank you.”


Victorian Quarry tiles restoration in Shropshire

Red and Black Victorian Quarry Tiled Floor Restored in Oswestry Read More »

Sprucing up Terracotta Tiles in Shrewsbury

Sprucing up Terracotta Tiles in Shrewsbury

Details below of a Terracotta tiled hallway and kitchen at a house in the historic town of Shrewsbury. The floor had been laid a couple of years previously but the customer had found it difficult to maintain the appearance especially in the kitchen in fact the customer’s description on their enquiry form was “Need to spruce up the hallway and kitchen floor.”

Terracotta Tile Before Cleaning in Shrewsbury Terracotta Tile Before Cleaning in Shrewsbury

Cleaning a Terracotta Tiled Floor

I cleaned the Terracotta floor with strong dilution of Tile Doctor Pro-Clean scrubbed into the tile and grout with a black pad and then rinsed off with clean water which was then removed with a wet vacuum. After rinsing the floor there were a couple stubborn spots left behind so they were spot treated using Tile Doctor Remove and Go which is a strong coatings remover that is safe to use on tile and stone and usually takes care of most issues and certainly worked in this case. The floor was then thoroughly rinsed to remove any cleaning product prior to sealing and then left to dry.

Terracotta Tile After Cleaning in Shrewsbury Terracotta Tile After Cleaning in Shrewsbury

Sealing a Terracotta Floor Sealing

I’d agreed with the owner to return a week later to ensure the tiles were bone dry and ready to be sealed and on my return I checked the floor for any problem areas in need of further cleaning and also for dampness. The Terracotta was dry enough to take the sealer so I sealed it using two coats of Tile Doctor Colour Grow which was chosen as the customer didn’t want a shine on the floor.

Terracotta Tile After Sealing in Shrewsbury Terracotta Tile After Sealing in Shrewsbury

Out of interest I’ve included the photograph below which shows how the sealer causes water to form on the surface of the tile due to the surface tension provided by the sealer.

Terracotta Tile After Sealing in Shrewsbury
The customer was very happy with the result and left the following testimonial on the Tile Doctor feedback system:
“Very pleased with the work carried out by Jozsef. He is a pleasant and hard working individual and very conscientious about his work. No hesitation in recommending his work.”

Cleaning and Sealing Terracotta tiles in Shrewsbury

Sprucing up Terracotta Tiles in Shrewsbury Read More »

Victorian Quarry Tiled Floor Restored in Telford

Victorian Quarry Tiled Floor Restored in Telford

The photographs below of a Red and Black Victorian Quarry tiled floor were taken at a 109 year old cottage in the town of Telford. Unfortunately the tiles were in a really neglected state after the completion of building works but we do like a challenge and agreed to do the work.

Victorian Quarry Tiles Telford before cleaning Victorian Quarry Tiles Telford before cleaning

Cleaning a Quarry Tiled Floor

The whole floor was covered in layers of mortar and plaster so a strong solution of Tile Doctor Remove and Go was applied and scrubbed into the floor using a rotary machine fitted with a black scrubbing pad.

The initial clean revealed a lot more of the mess that had been left over from the builders mixing of mortar and concrete so I decided to try an acid based product called Tile Doctor Grout Clean-Up which is mainly used for the removal of grout from the tile surface but works on other cementitious materials as well. This worked well but required several applications to remove it all and once complete the floor was given a thorough rinse with clean water to ensure it was clear of the resultant slurry and there was no trace of cleaning product. A wet vacuum was used to remove the water from the floor and get it dry so it could be sealed.

Sealing a Quarry Floor Sealing

Once the floor was dry I sealed it using two coats of Tile Doctor Colour Grow which was chosen as the customer wanted a matt finish; Colour Grow also brings out the colours in the tile and it’s an impregnating sealer that occupies the pores in the tile to provide excellent stain protection.

I think you will agree the photographs below shows an amazing transformation that exceeded all expectations.

Victorian Quarry Tiles Telford After cleaning Victorian Quarry Tiles Telford After cleaning


Restoring old Quarry tiles in Shropshire

Victorian Quarry Tiled Floor Restored in Telford Read More »

=================================

Shropshire Tile Doctor

================================= Read More »

Scroll to Top